Adding hybrid locations to your programs
In addition to online and in-person locations, you can now use the hybrid locations for programs that you want to hold as both online and in-person.
Follow the instructions below
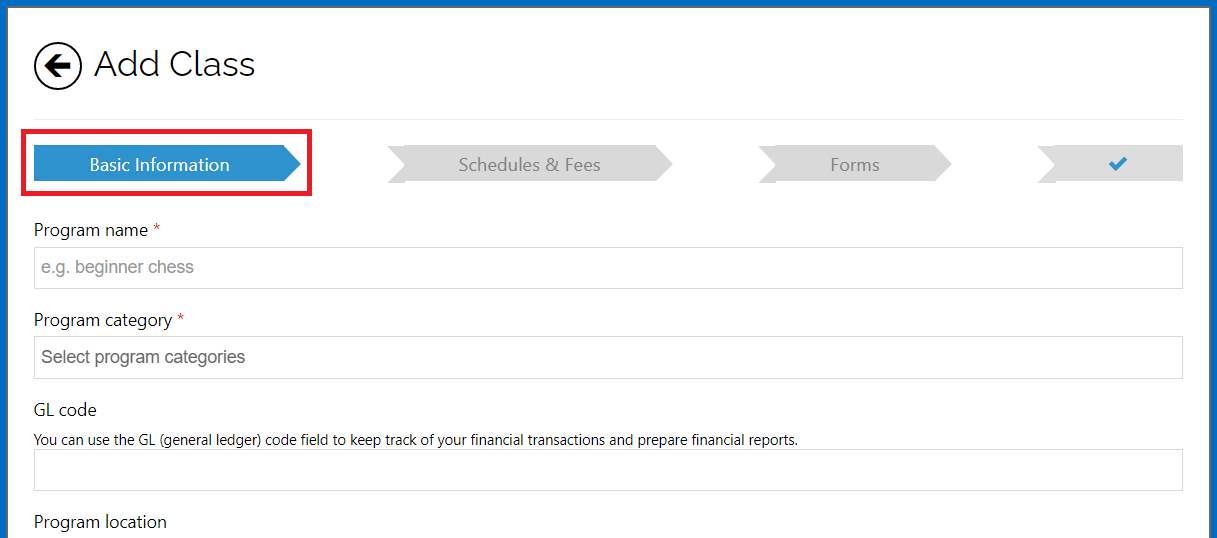
While setting up a program on Basic information step:
- Find the Program location section
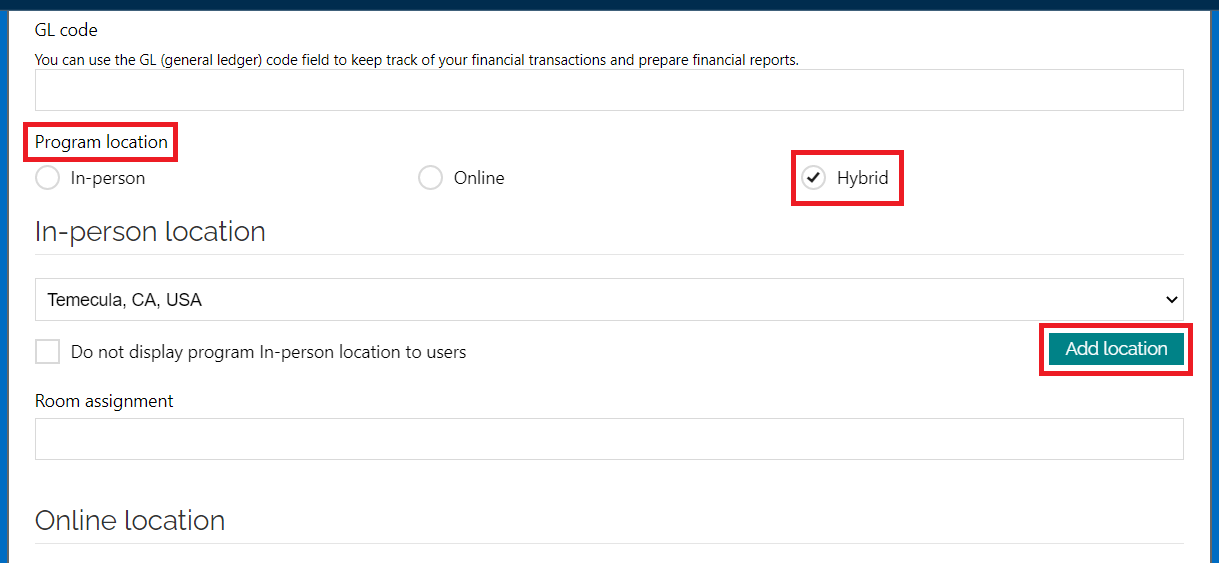
- Select Hybrid option
- Add in-person location by clicking on the Add location button in the In-person location section
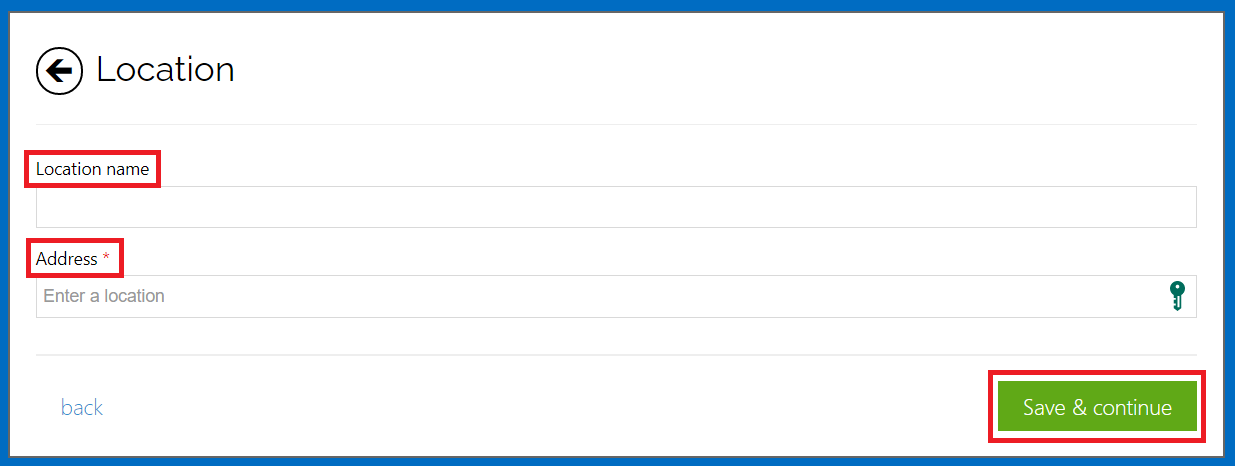
- Fill out the Location name field if applicable
- Fill out the Address filed
- Click Save & continue
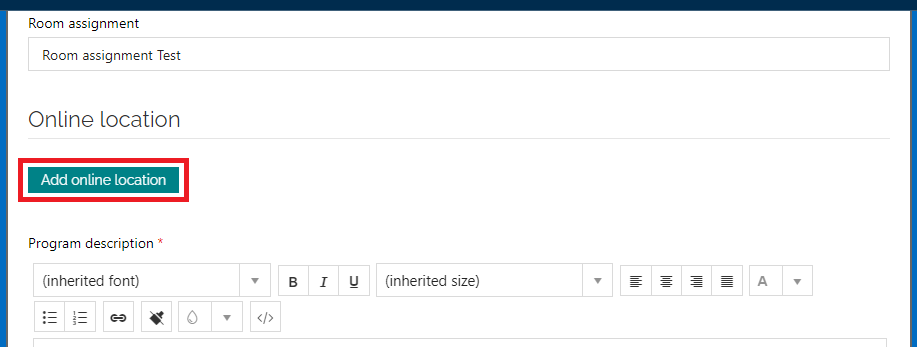
- Fill out the Room assignment field if applicable
 Note: You can have different in-person locations for your program by clicking on Add location button again. Also, you can edit and delete the in-person locations.
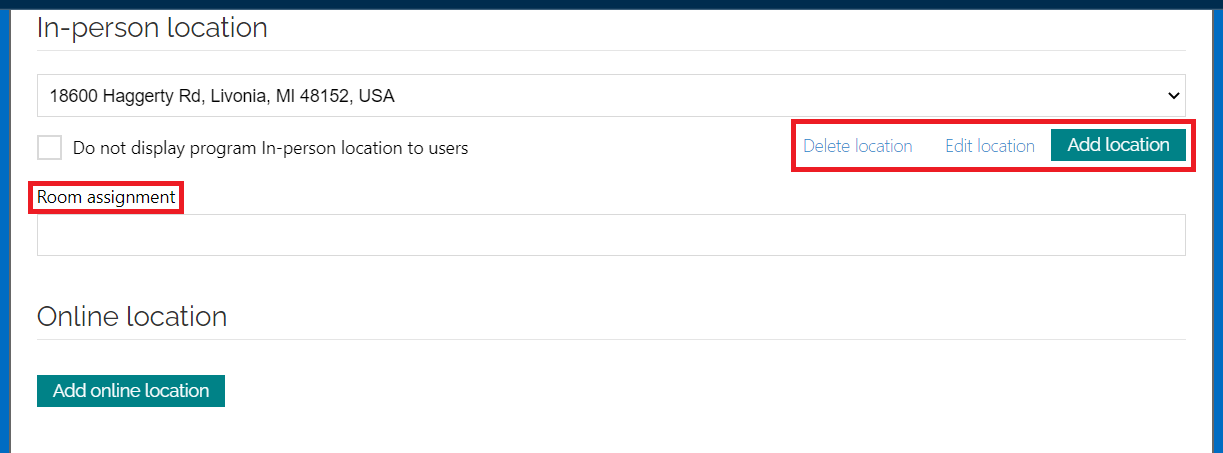
- Add online location by clicking on the Add online location button in the online location section
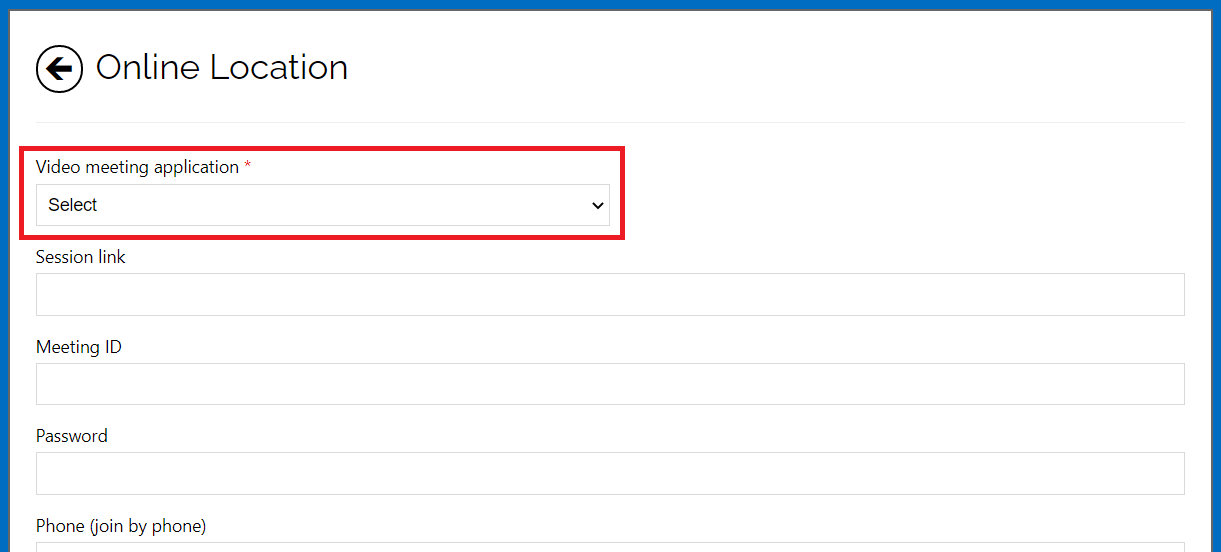
- Select your application by clicking on the Video meeting application dropdown menu
- Add the needed details to the other fields
- Click Save
- By default we just show the video meeting application name to the users (in the registration page and confirmation email) if you want to display other details like session link, meeting ID, etc. then you should uncheck the Do not display program online location to users checkbox.
Note: Unlike in-person locations, you can only have one online location for a program. Furthermore, you cannot delete an online location, you can only edit it.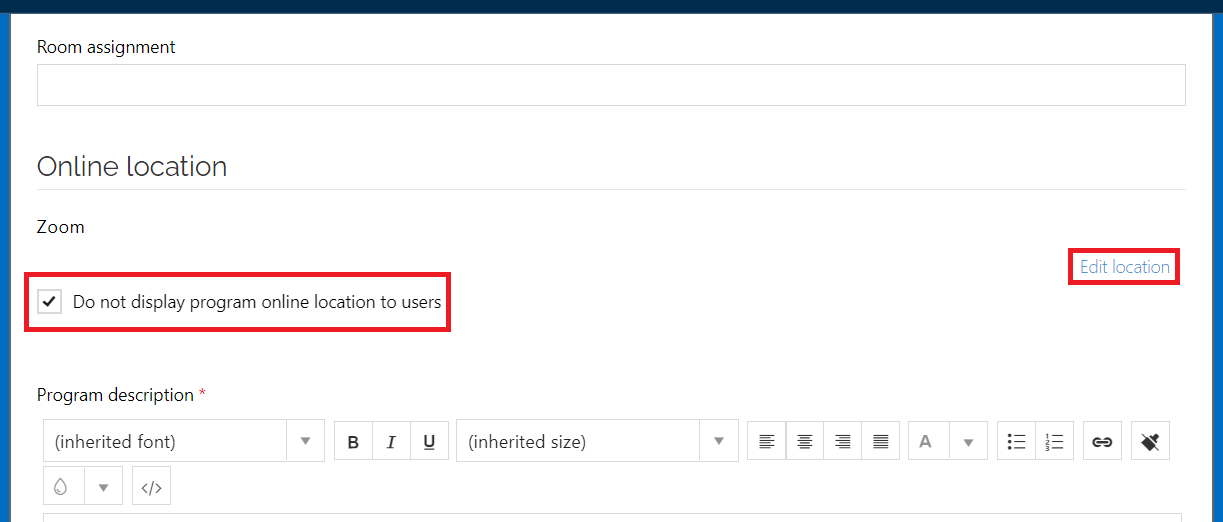
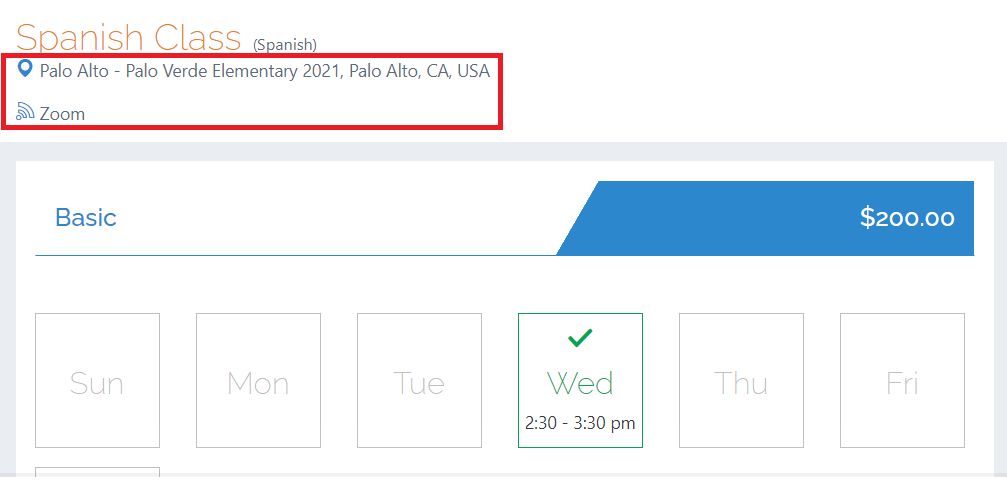
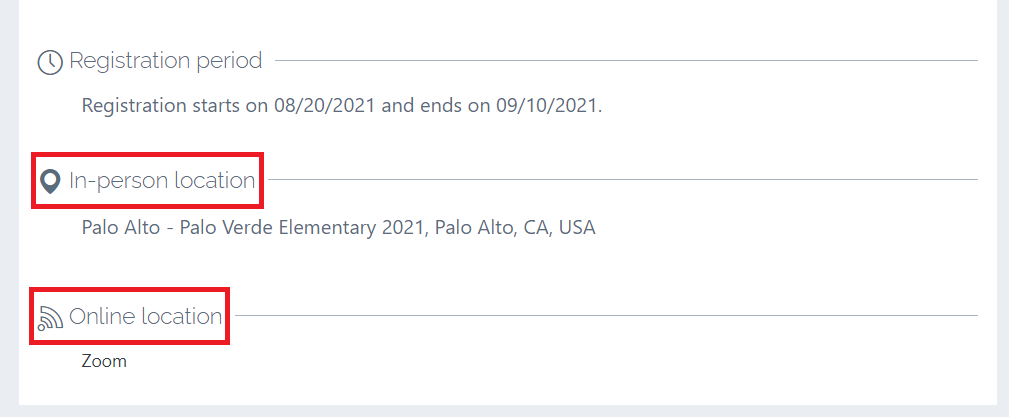
Below is an example of what registrants see at the top and bottom of the registration page.
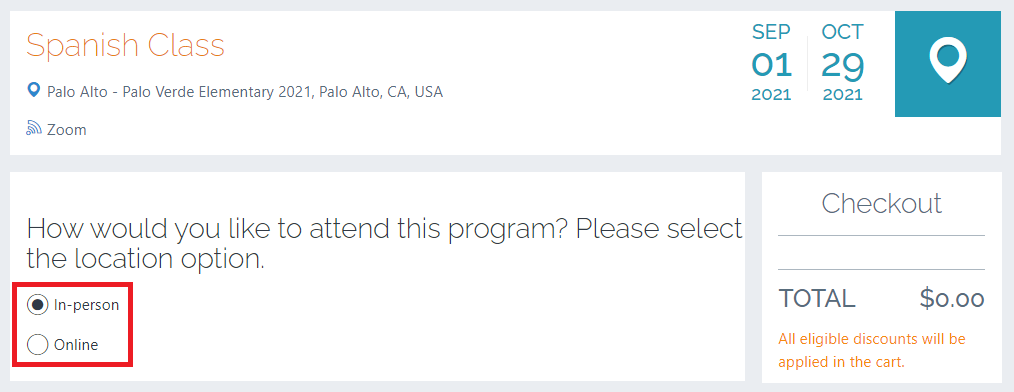
In the screenshot below you can see the first step of the registration flow. In addition to choosing the tuition option, they must also select how they want to attend the program, online or in-person.
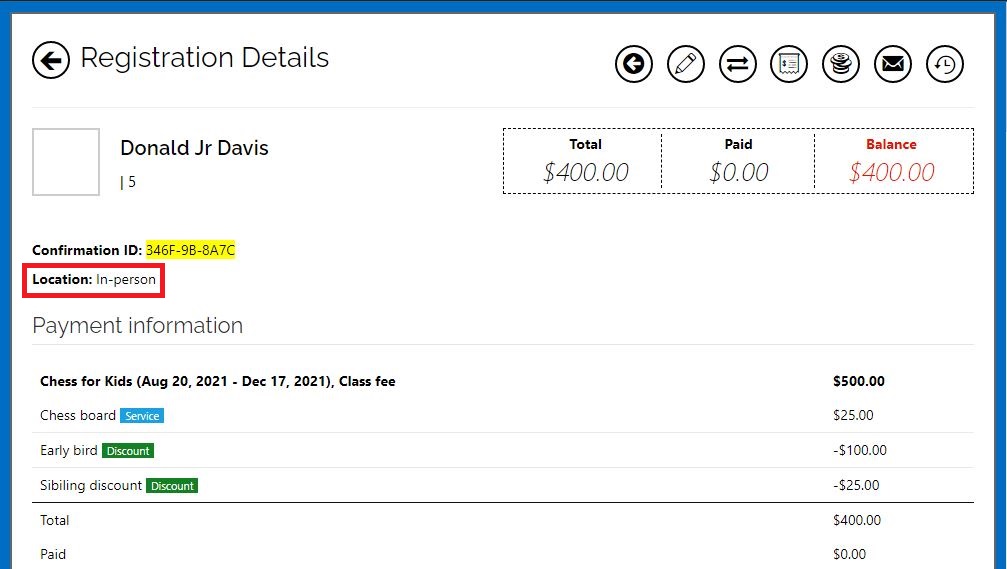
Below is an example of what you see as an admin on the Registration Details page.
Related articles:
Adding online location for virtual classes
Contact us
Please don't hesitate to reach out if you have any questions. Contact our support team at support@jumbula.com.
Related Articles
Adding online location for virtual classes
Jumbula supports online locations in addition to physical addresses. Online locations provide further capabilities such as external video conferencing options (Zoom, Google Meet, Skype, etc.) and built-in Jumbula Meet. While setting up a program on ...Can I apply discounts based on the number of programs registered for?
Yes, you can set up multi-program discounts that trigger once a participant registers for more than one program. ? Watch tutorial → https://www.youtube.com/watch?v=-g4d7tQDGHw Need help? Our support team is here to help you succeed. Contact us at ...How to create free programs?
Overview Often, you will want to create programs that are free or no-cost. It’s built for events like community gatherings, information sessions, trial classes, fundraisers, or any activity aimed at attracting, educating, or giving back, rather than ...Adding images to the class description page
Overview Adding images to your registration page can make a big difference, as they say, "a picture is worth a thousand words". We have now included the option to add images to your online class registration page, this is done directly within the ...Can I edit a program after it's live?
Yes, programs can be edited anytime. Updates apply only to new registrations, not existing ones. ? View full guide → How can I edit a program or class? Need help? Our support team is here to help you succeed. Contact us at support@jumbula.com, or ...