Donation overview
You can use the built-in donation feature of Jumbula to ask users for additional when they enroll for a class. You can also use the donation feature to generate a standalone link and send to your userbase.
Follow the instructions below
- Go to the Admin dashboard > Settings > Checkout
- Scroll the page down to find the Donation sectionIn this section, there are two options to enable donation:
- Enable standalone donation
- Enable cart donation

Standalone donation
To enable the Standalone donation:
- Tick the Enable standalone donation checkbox
- Click the Save
After you enable the standalone donation, we will generate a link, which you can embed in your website or send to users through email. As you can see in the gray box, the standalone donation URL is:
As an example, note the URL in the following screenshot for the domain "Academy":

After clicking this link, users must fill out a short form and select the amount of money they want to donate. You can edit the default form and change the amount by clicking on the Edit donation form button.

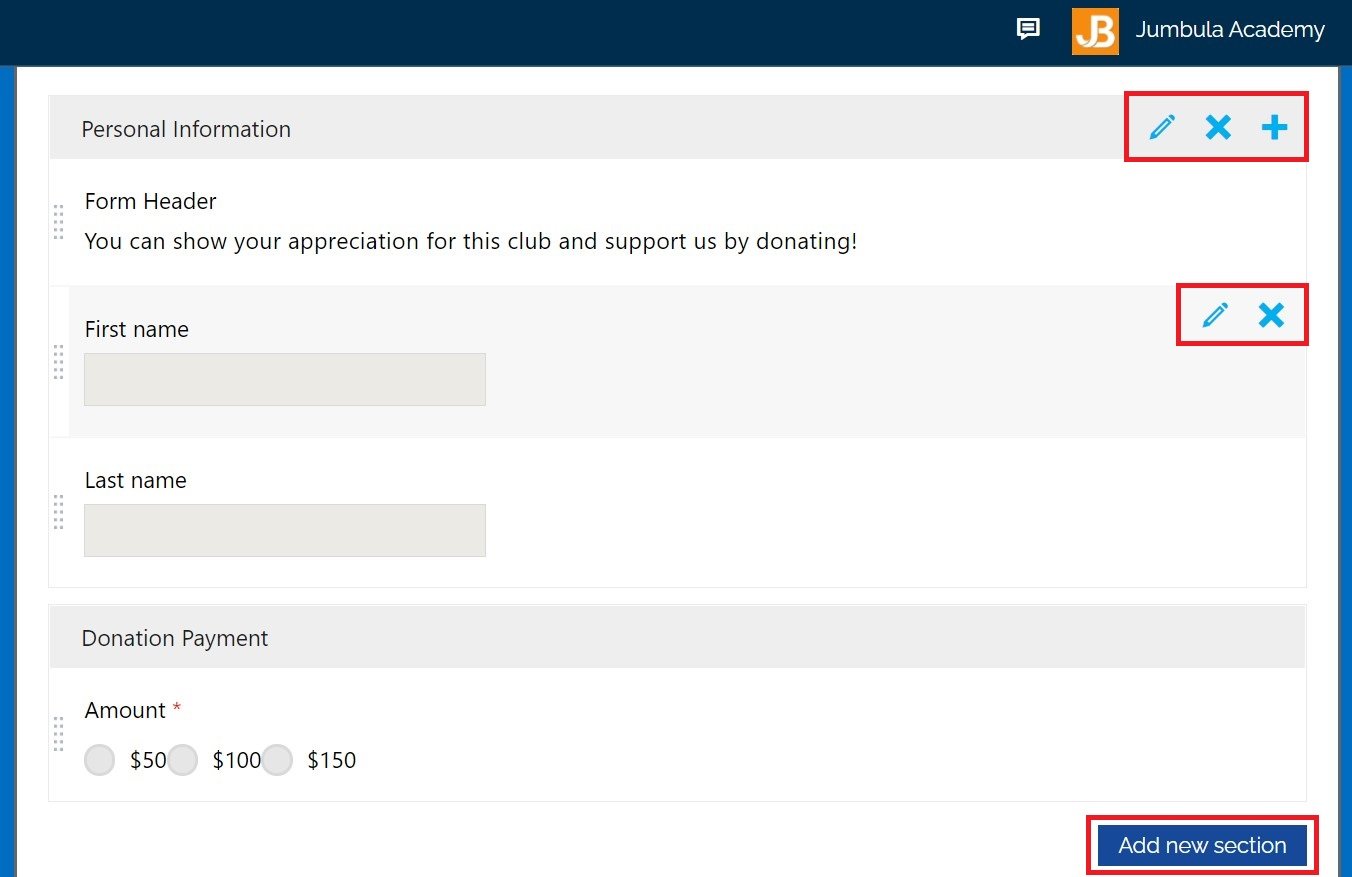
On the mange input form page, hover over any section or question that you want to change and then:
- To edit a section's header or a question, select the Pencil icon.
- To delete a section or a question, click on the X button.
- To add a new question, click on the Plus sign.
- To add a new section, click on the Add new section.
What do users see?
Once users click on the standalone donation link, they will be directed to the page to fill the form and determine the donation amount.
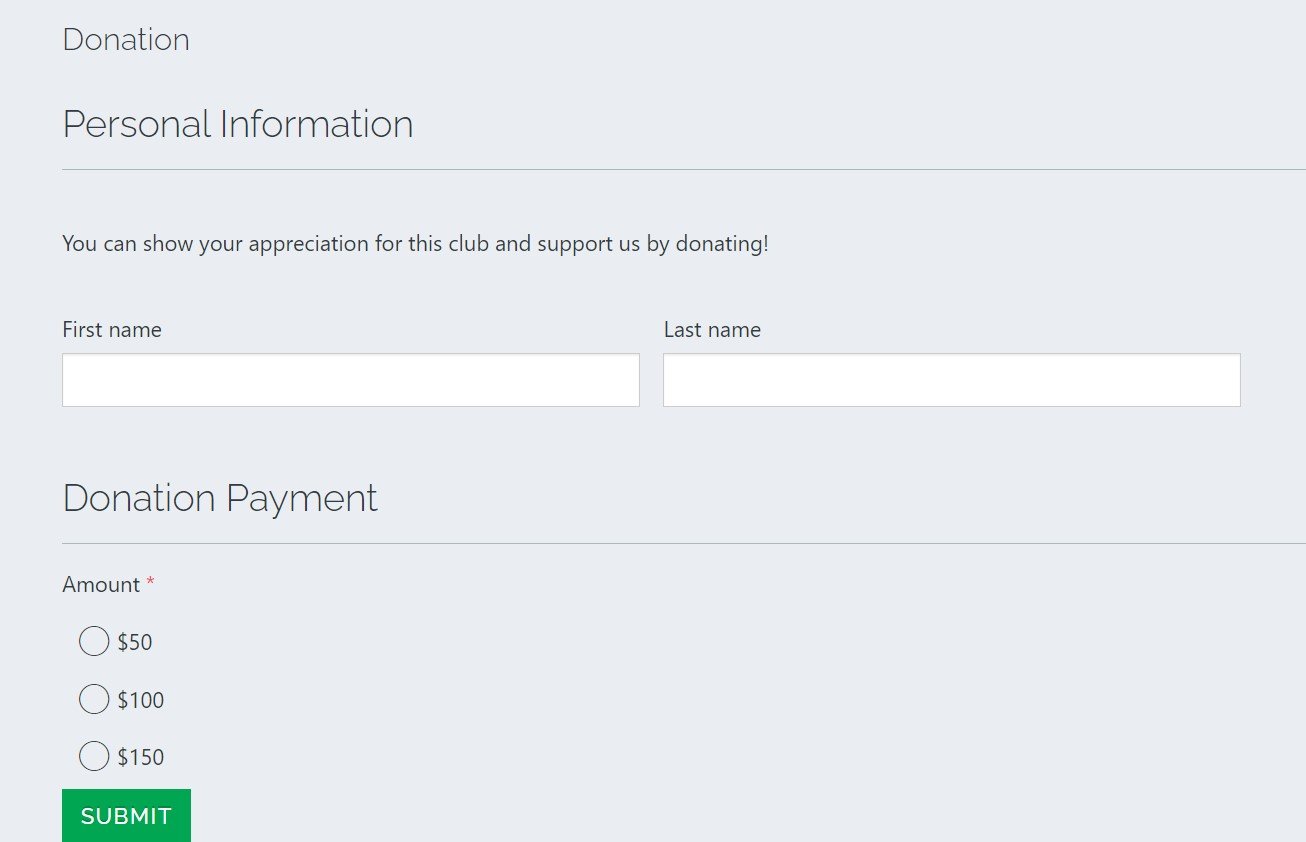
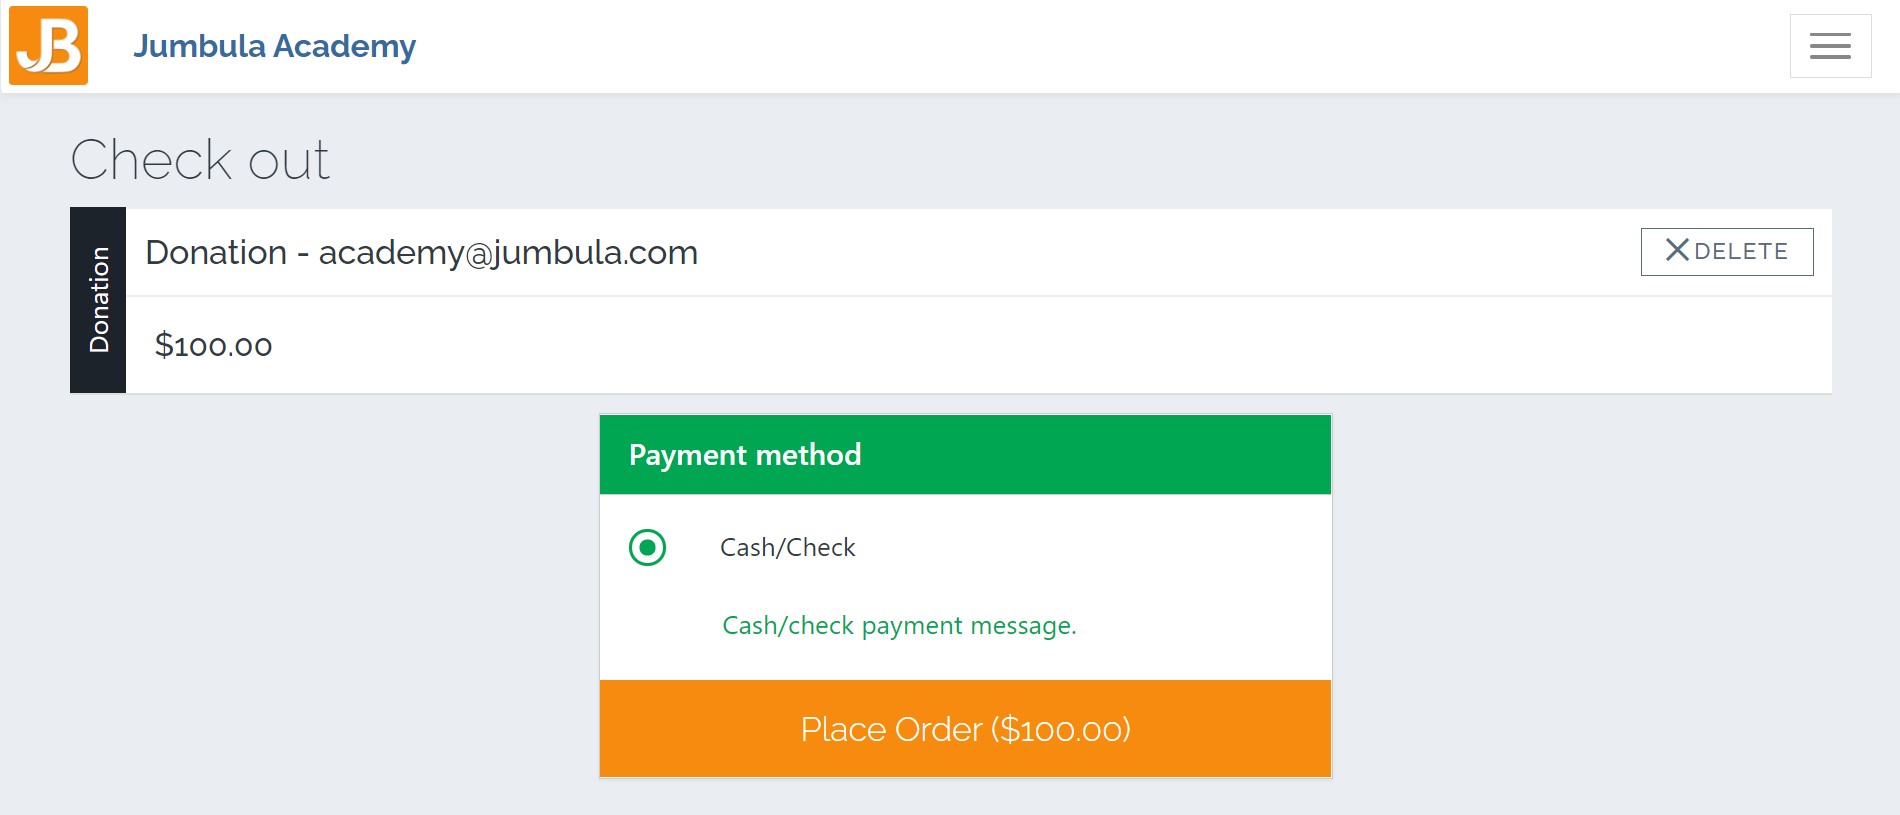
After clicking the Submit button, they will be directed to the checkout page to pay for the selected amount.
Cart donation
To enable the Cart donation:
- Tick the Enable cart donation checkbox
- Click the Save
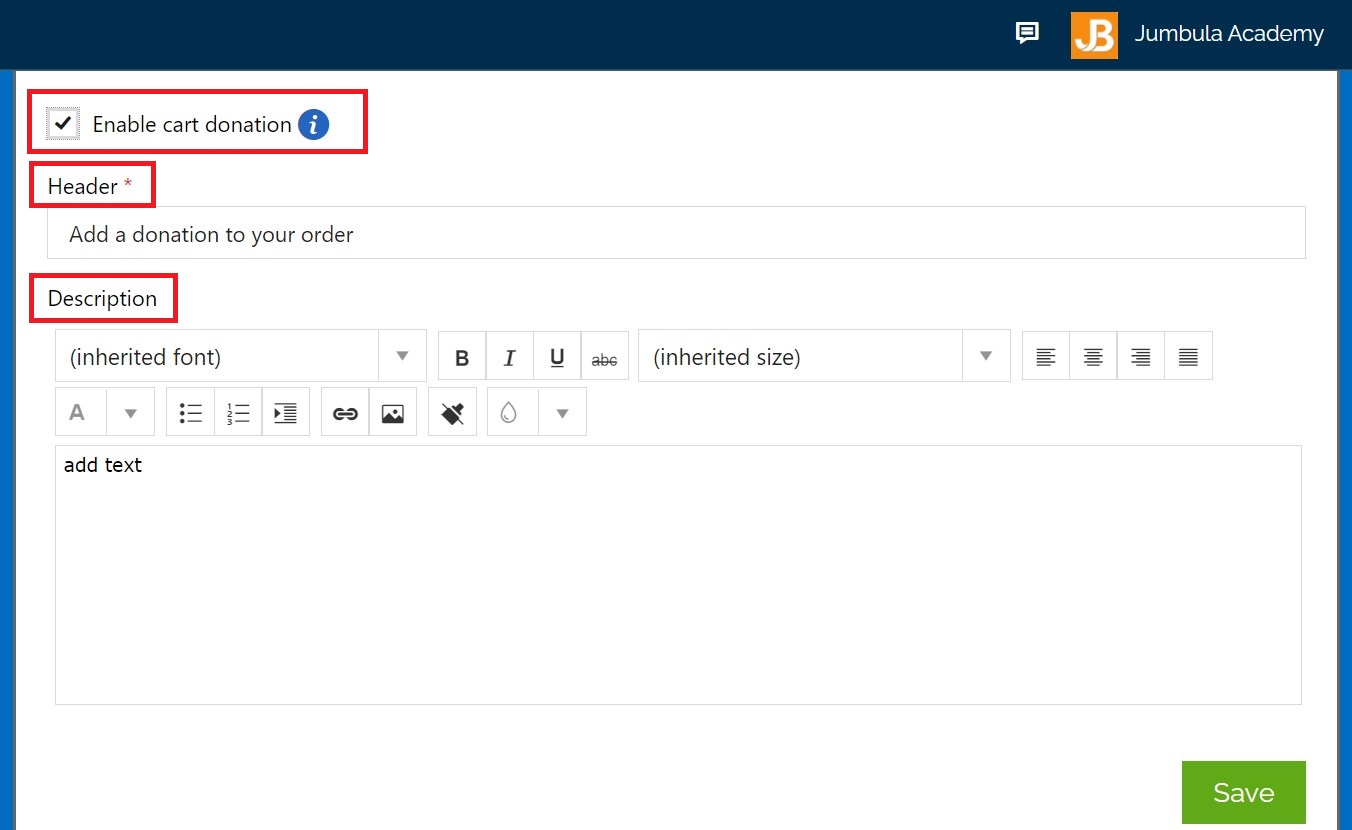
When you enable Cart donation, a new section will be displayed in the checkout. To change the section's header and description:
- Enter your desired header in the Header box.
- Enter your desired description in the Description box.
What do users see?
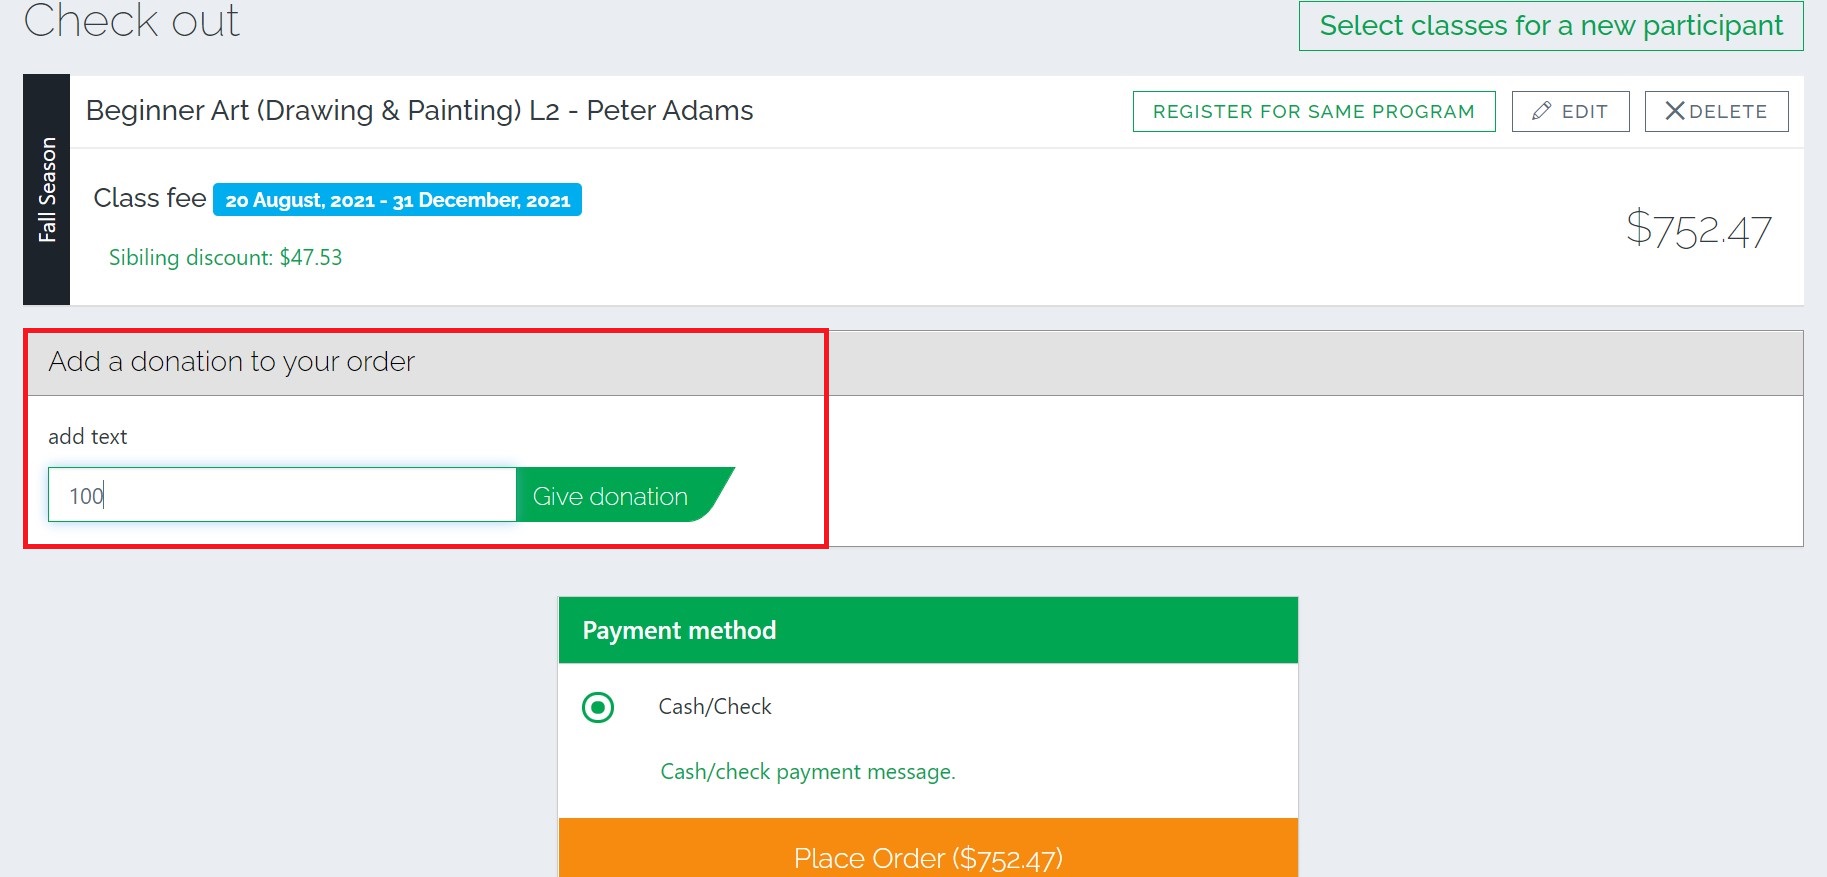
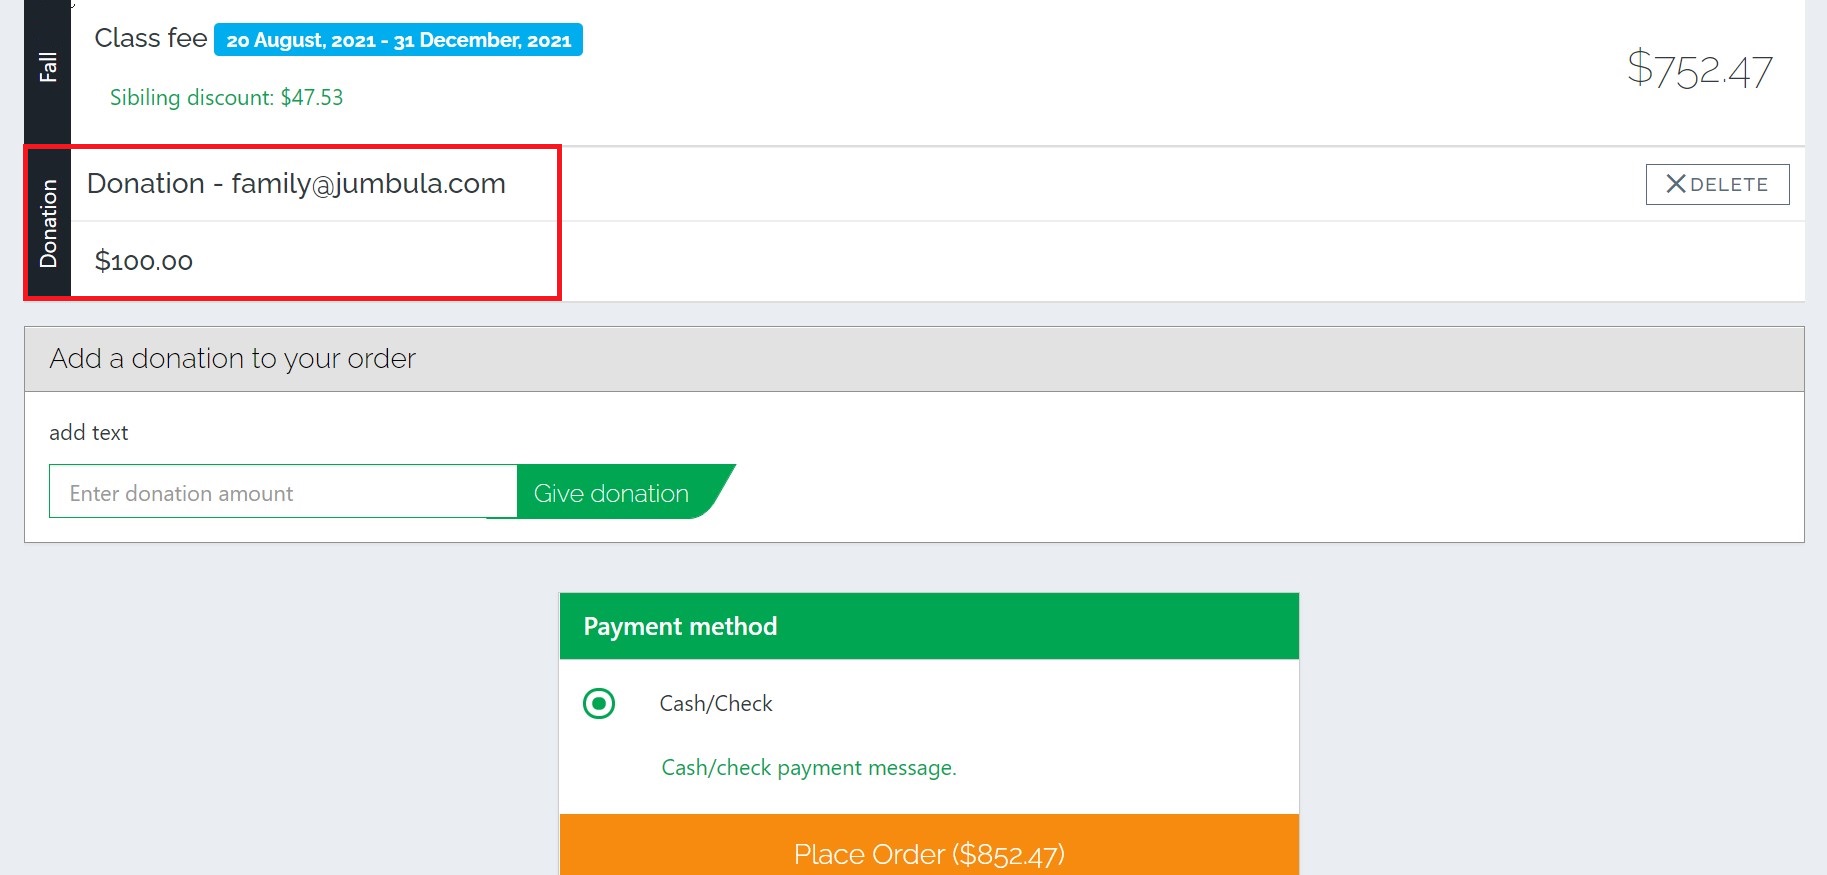
Users will see the donation section when registering for a class and proceeding to the final step of the registration process, Checkout. They can enter any donation amount they desire. Once users click the Give donation button, the amount will be added to their cart.
Contact us
Please don't hesitate to reach out if you have any questions. Contact our support team at support@jumbula.com.
Related Articles
Season overview
Overview When you start your set-up process the first thing you will do is create a new season. Seasons are used to organize your programs (classes, camps, events, etc.) into different groups. You will have a variety of different ways to organize ...Coupons overview
Overview As part of your online registration setup options, you will be able to create coupons within each of your seasons. This is a great way to offer incentives and price discounts. You will be able to define if your coupons have a fixed amount or ...Program overview
Overview Once you have created a season the next step is to set up a new program. You will start by selecting the program that best fits your needs from a variety of options such as class, camp, before/after care and seminar/tours. Each program has ...Refunds overview
Overview You will have the function to apply a refund directly from your admin dashboard. You will have an option to apply a refund automatically (funds are returned directly to the payers' credit card), manually (this is when you issue a direct ...Discounts overview
Overview As part of your online registration setup options, you will be able to create discounts within each of your seasons. Discounts get triggered automatically depending on your setup criteria. You will be able to create discounts such as sibling ...