How to enable drop-ins?
Overview
When you create a program with a defined schedule, you should offer registrants the option to register for individual sessions (drop-ins) rather than registering for the entire schedule. In this case, you can enable the Drop-in option and assign an individual session rate.
Description of steps
When setting up a camp or class, you will find this feature in the Create a new program wizard under the Schedules step > Tuition options section.

Note: If you already have an activity and you want to enable the drop-in, go to Seasons > Desired season > Setup > Programs > hover over the desired program > Edit Schedules and fees
Step 1
Check the Enable drop-in box. Then, you will see a Drop-in label box. Here, you can enter the label that will be visible to registrants, for example, Daily Drop-in.
Here you can see what will be displayed to your registrants:
Step 2
Then, in the Tuition Labels section, you can enable Drop-in for each tuition label in case you have more than one.
Step 3
After enabling Drop-in for a tuition label, you should assign a name and price, and, if you would like, specify the minimum number of drop-in days. This is useful if you want registrants to pick a minimum number of drop-in days per order.
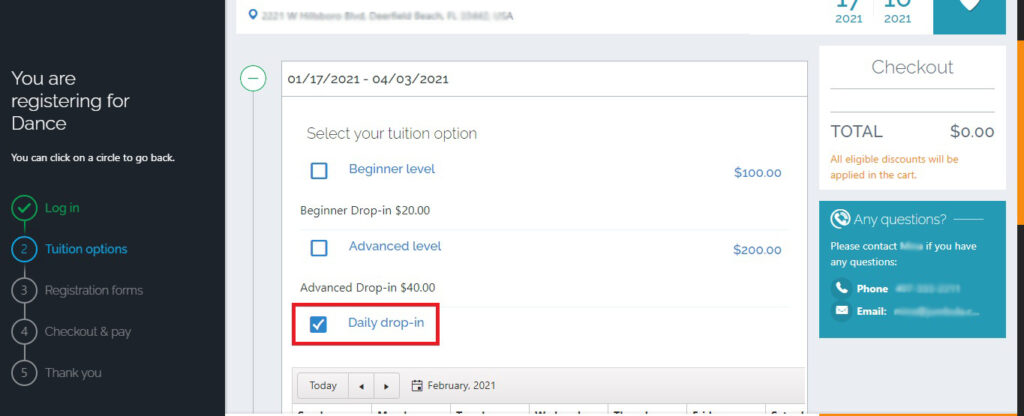
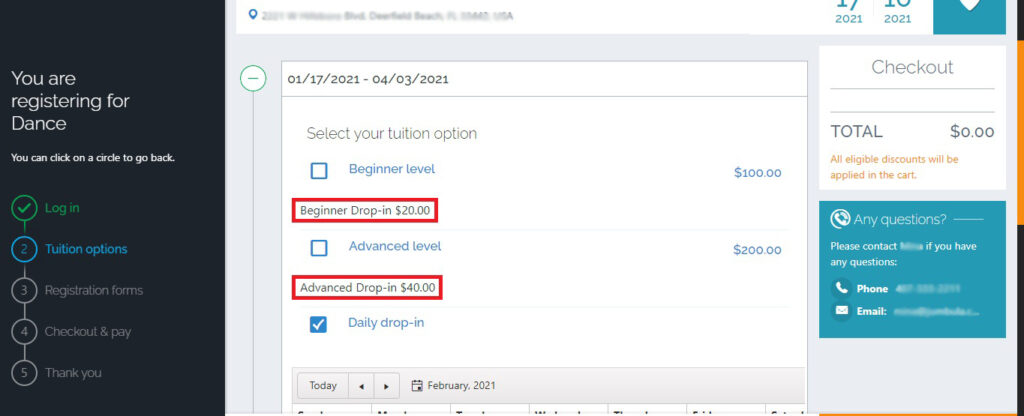
This is a sample of what users will see when registering:
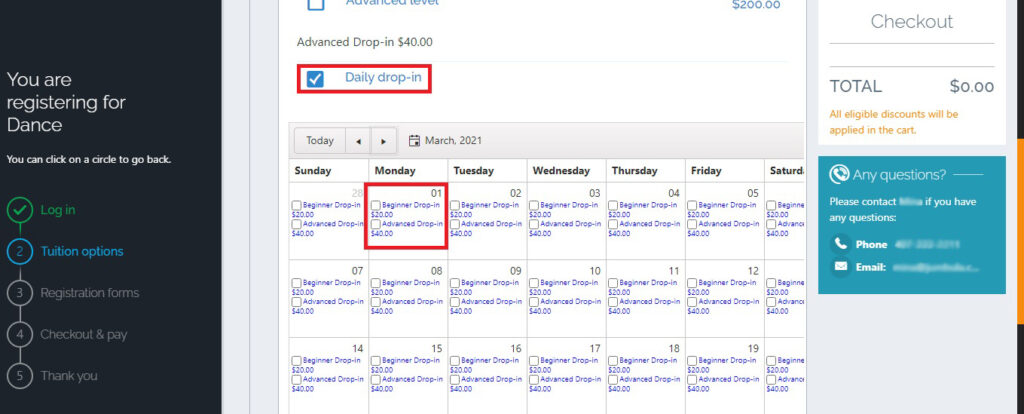
Once a user selects a drop-in option, a calendar will collapse to display the available options.
Related articles
Related Articles
How to Enable The Lottery System
Overview The lottery system lets you randomly select which users can register for a program from a pool of candidates. It’s especially useful for high-demand programs with limited spots, ensuring a fair and unbiased selection process. The lottery ...Adding application fee to a season
As a part of the online registration setup, you can apply an application fee to orders. The application fee gets triggered automatically depending on your setup criteria. Follow these instructions to apply application fee Go to Jumbula Dashboard > ...How to enable and customize the waitlist notification email?
Overview When a participant is added to or removed from a waitlist, two notification emails are sent. One email notifies the parent to confirm the change, and the other is sent to the admin. Before You Begin ✅ Setup is done in the Classic admin ...How to set up multi-class registrations?
Overview When setting up your Jumbula homesite, you can choose to post your programs individually for single registrations or use multi-class registrations, which allow participants to enroll for multiple classes in a season at once. You may also ...How to use the Bulk Cancellation feature?
Overview You can cancel multiple or all orders of a single activity at once using the bulk cancellation feature. Description of steps Go to Classic Admin Dashboard > Seasons > Selected season > Programs and enrollments > Select the desired program On ...