Invoicing overview
Overview
The invoicing feature allows you to create and send invoices to users. Users can pay the invoice directly on their portal or by clicking the pay button located in the triggered email.
Before you begin
✅ Requires Admin role or role with permission.
✅ Setup is done in the Classic Admin dashboard.
 Note: For more information about staff permissions, see How to manage staff and permissions?
Description of steps
Click on the invoicing icon located on your dashboard panel and select Add invoice or the plus sign (+) at the top right-hand side:
Note: You can also go to People > Families to create an invoice.
A list of your families will be displayed. You can search for a family profile by various criteria (such as name, email, confirmation ID, phone number, etc.) and then click Search. Once the result is displayed, hover over the Actions column and click on Invoice.
After clicking Invoice, you will see a list of all orders associated with the selected family profile. As shown in the example below, you can click the checkbox associated with a unique confirmation number. Finally, you can click the checkbox for any particular order under that confirmation number, then click Continue.
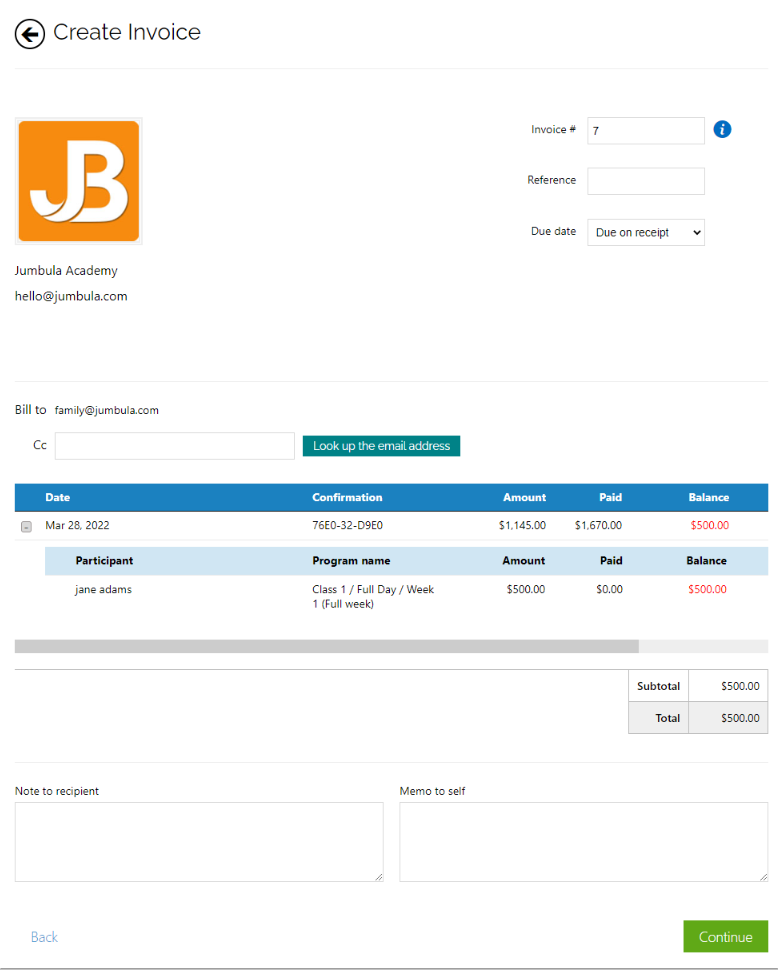
Now that you have selected the order(s), you will get the screen below. At this point, you will complete several details to create the invoice. Items you will fill out are:
- Invoice number
- Reference
- Due date
- Add a carbon copy (CC) email address
- Note to recipient
- Memo to self
Step 6
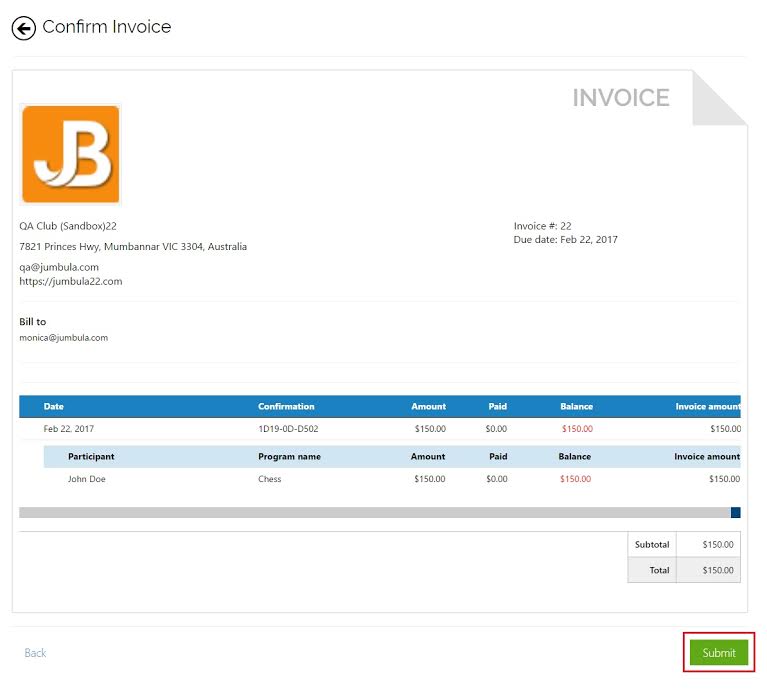
Once all steps are completed, click the Continue button to proceed. You will then be able to view the invoice, and you are ready to proceed. Check all the information and click the Submit button to finalize.
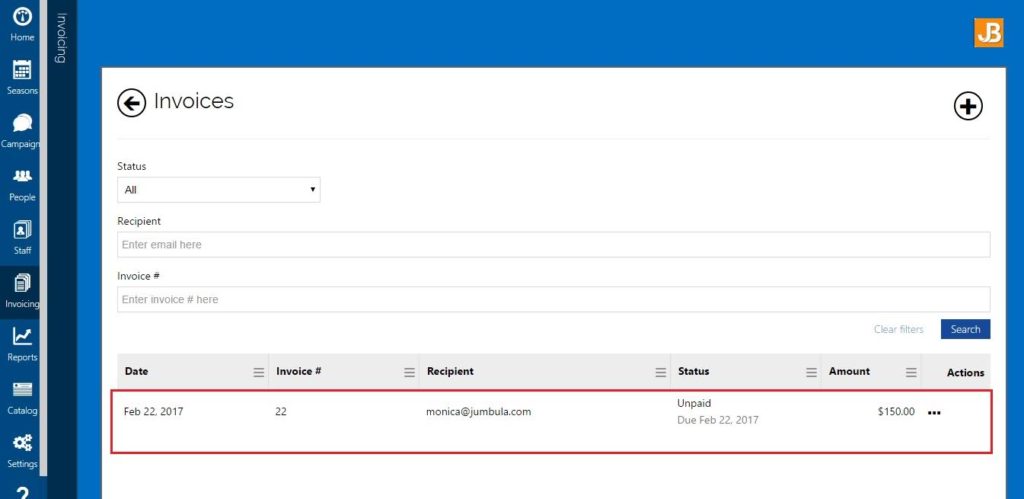
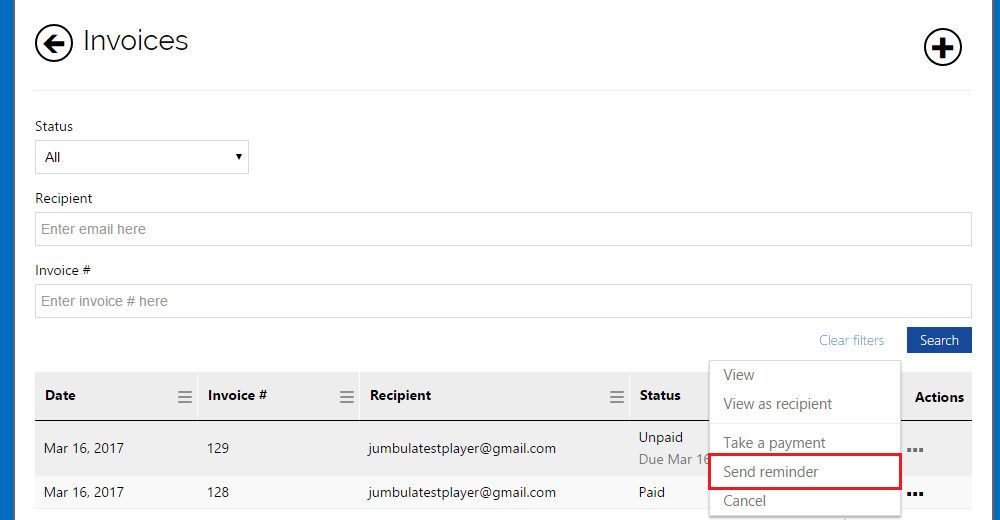
Now that the invoice has been submitted, you can review its status. To do this, you click on the Invoicing icon on your main dashboard panel. Notice in the example below that this invoice shows as unpaid under the Status column. You will be able to search for invoices by Status (all, paid, unpaid, and past due), Recipient (profile email), or Invoice number.
Managing your invoices
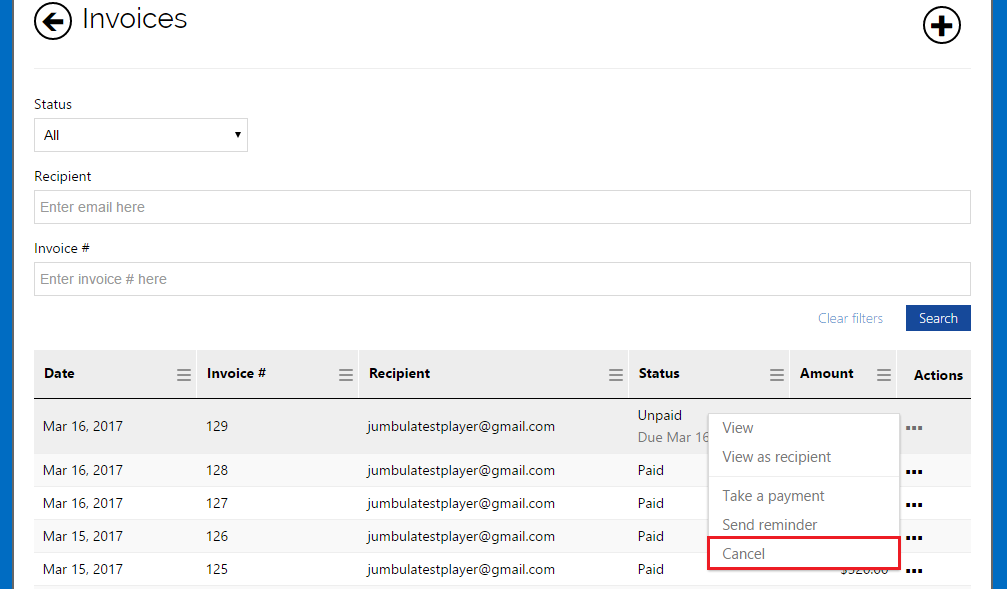
Once you have created an invoice, you will have several management options: take a payment from within the invoicing tab, send reminders, or cancel an invoice. Below are screenshot samples along with more specific details.
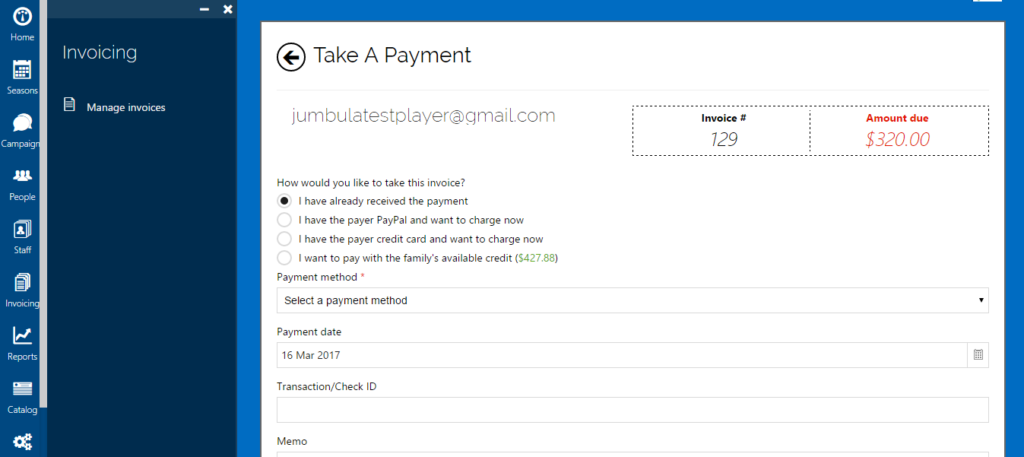
Take a Payment
When reviewing your invoices, you can directly access the Actions tab and use the Take a payment option to apply a payment towards a specific invoice.
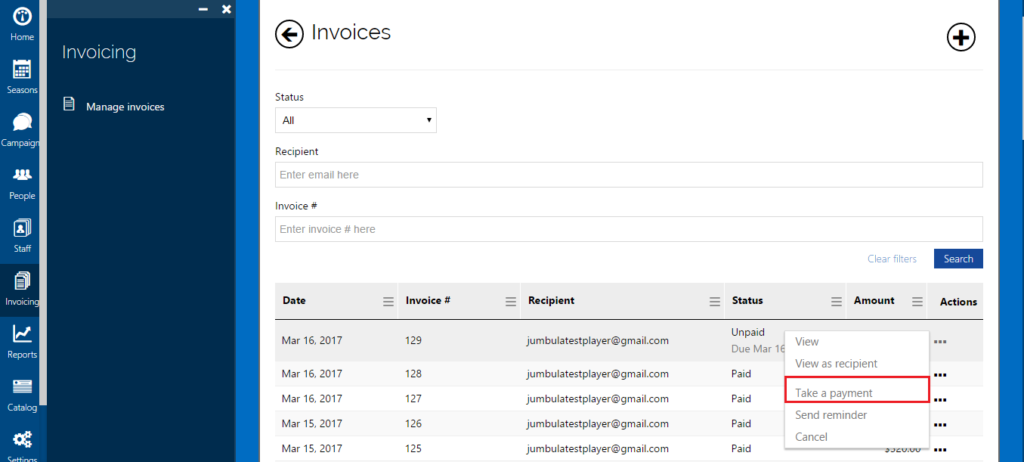
You will have the option to apply a payment you have received at the time with a credit card or PayPal, or use available credit.
Send Reminder
In the Actions column, you can also send a reminder.
Cancel Invoice
Finally, under the Actions column, you will have a Cancel Invoice option.
Related Articles
How to use the Bulk Cancellation feature?
Overview You can cancel multiple or all orders of a single activity at once using the bulk cancellation feature. Description of steps Go to Classic Admin Dashboard > Seasons > Selected season > Programs and enrollments > Select the desired program On ...Take-a-payment overview
Overview Once you have taken online registrations where you did not take a payment in full you will need to update your orders as you collect payments. This can be the case when you use the "cash/check" checkout option or when you offer a payment ...Payment plan overview
Overview As part of your online registration setup options, you will be able to create payment plans within each of your seasons. Besides offering the pay in full option you will be able to offer your registrants with payment plan options. Here you ...Can registrants choose from multiple payment plans?
Yes, you can offer multiple payment plans, and registrants can select from available options during registration. ? View full guide → Payment plan overview Need help? Our support team is here to help you succeed. Contact us at support@jumbula.com, ...Class confirmation and cancellation email
Overview The Class Scheduling Email feature lets you easily send emails to the entire group of users who have registered for a specific program. The email consists of two types: Confirmation Email: This email informs all the participants that the ...