Participant groups
Overview
The grouping tool is designed to help you manage registrations where you might have the need to break participants into smaller groups. You will be able to assign enrolled participants into predetermined groups and assign individual instructors if needed. This can be used for class pods, breakout groups, lodging, etc. Follow the below steps to use the grouping tool.
Step 1: Go to your Jumbula dashboard and click on the "Tool Box" icon and then "Grouping icon".
![]()
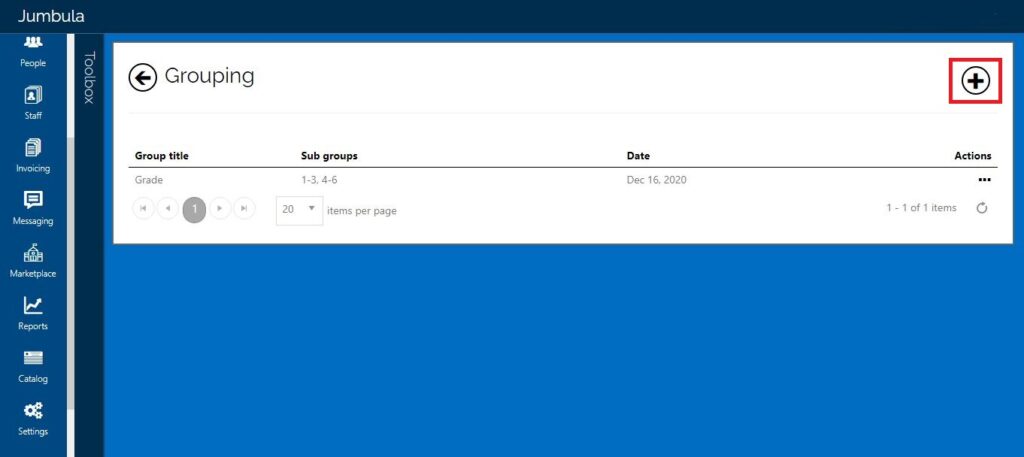
Step 2: Click on the plus (+) sign at the top right-hand side.
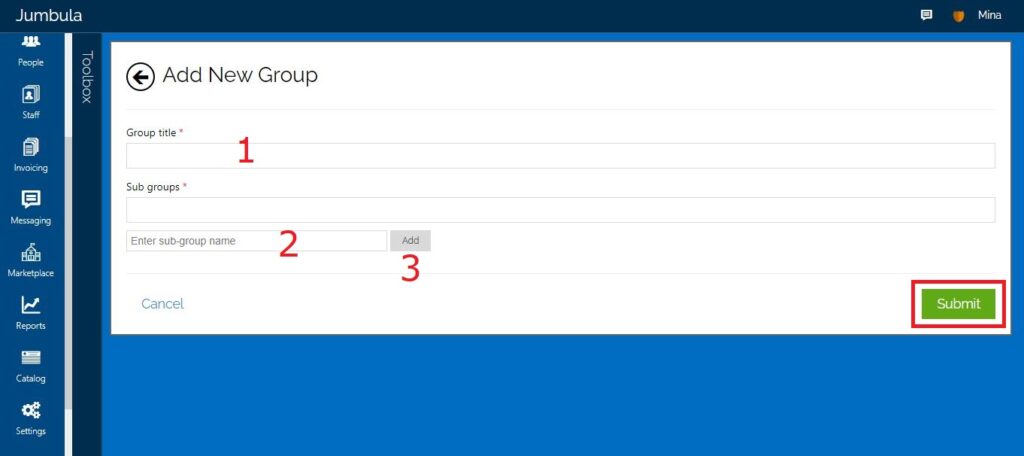
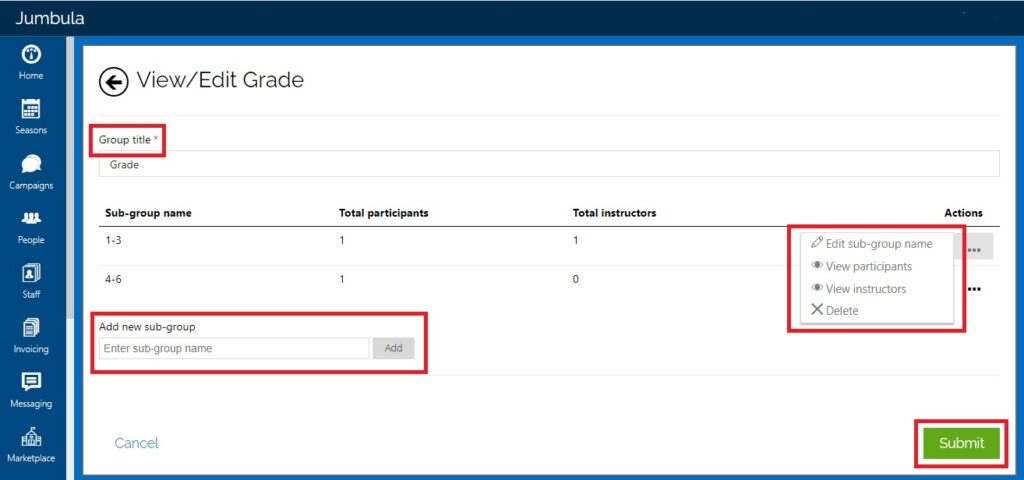
Step 3: Now you can enter a name in the "Group title" box and enter a name for your "Sub groups" and hit the add button to create the sub group. You can add as many sub groups as needed. For example, your Group title could be Spanish Level 1 with sub groups, Spanish L1 Group A, Spanish L1 Group B, etc.
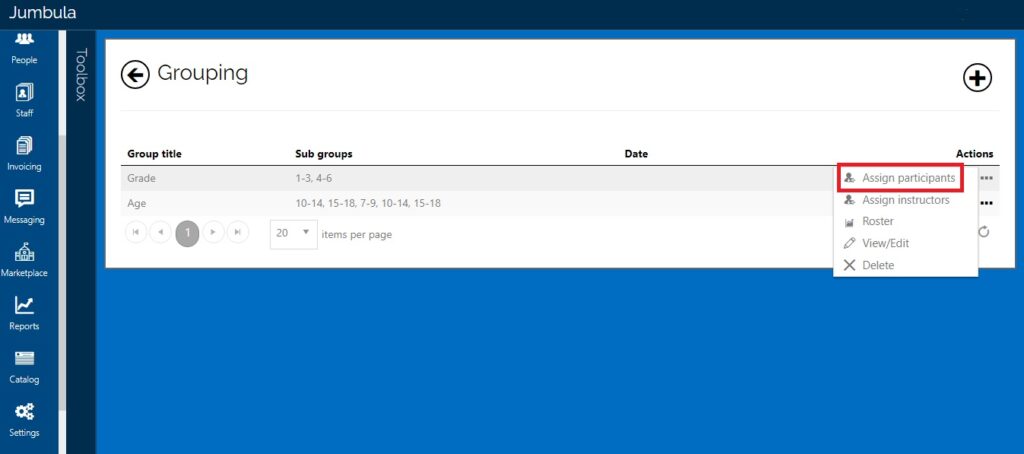
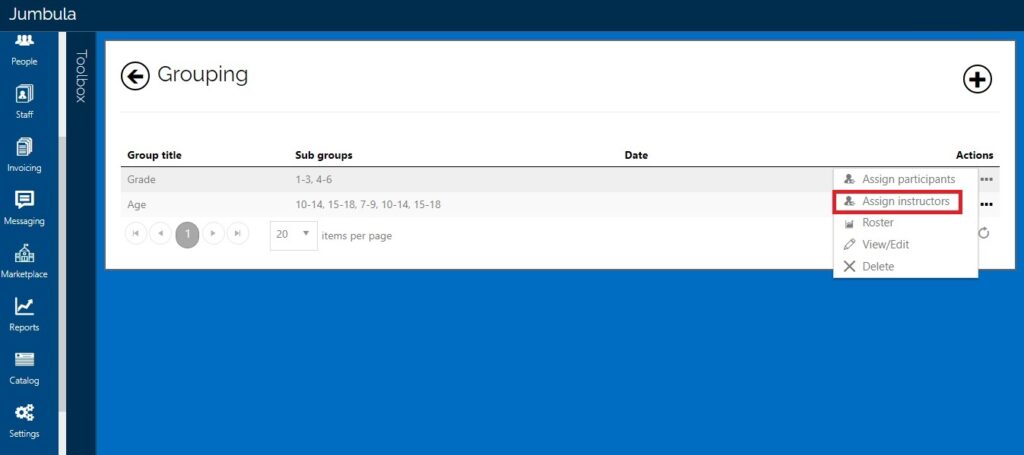
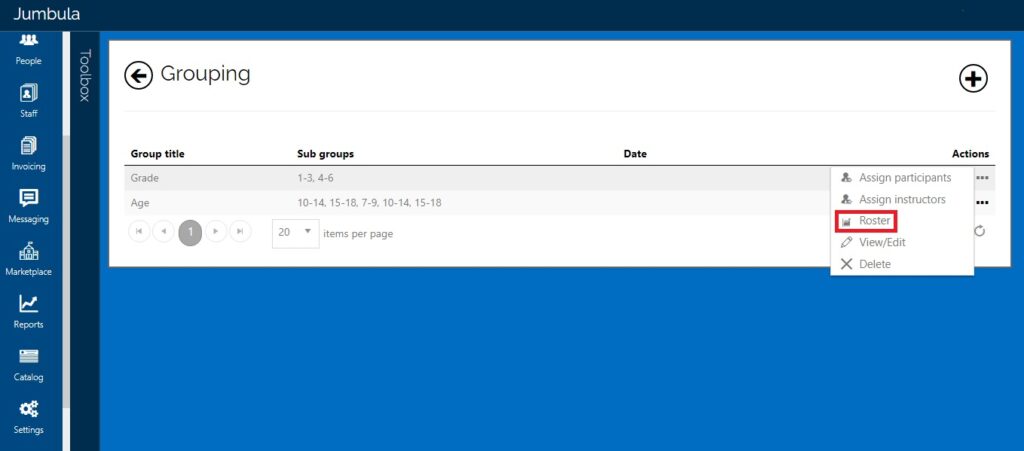
Step 4: Back in the Grouping menu, you can hover over the action button and select "Assign participants".
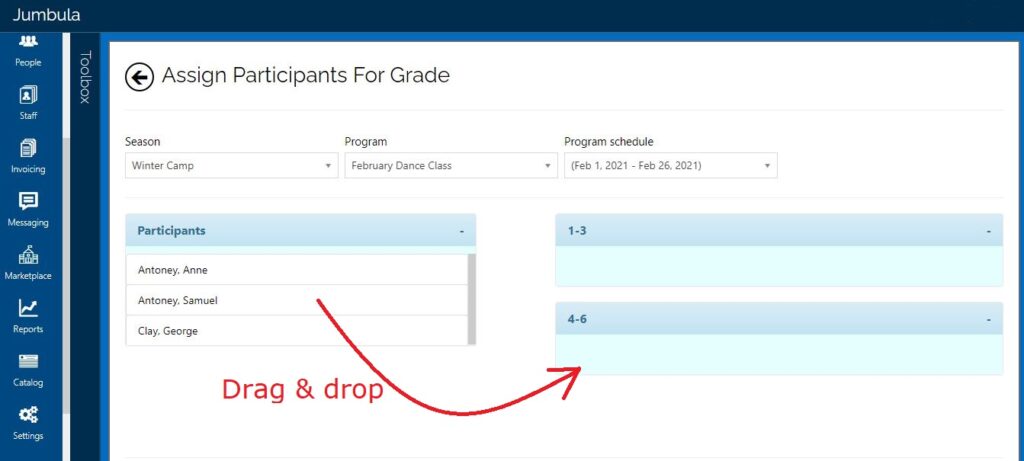
Step 5: In the "Season" box you can choose your desired season from the drop-down menu, next choose the program you want to group from "Program". As a result, all enrolled participants for that program will be displayed in the participants field.
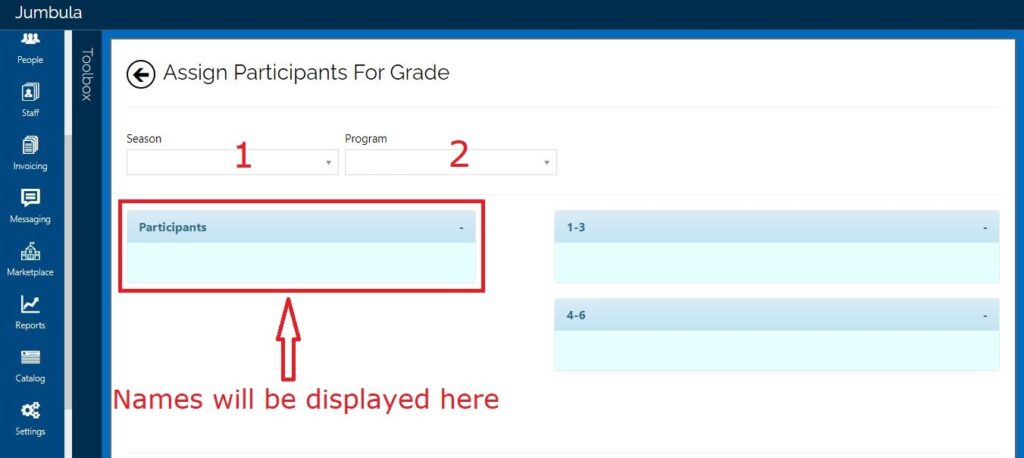
Note: If you choose a before/after care program another box will be added to this section displaying the Program schedule.
Step 6: You can assign any participant that you want to a specific sub group by drag and drop action and you can remove a participant from a sub group by dragging that participant from sub group to participant box. Once a participant is added to a group you will see a number in front of the name indicating how many groups the participant is assigned to. After finishing your selection click "Submit".
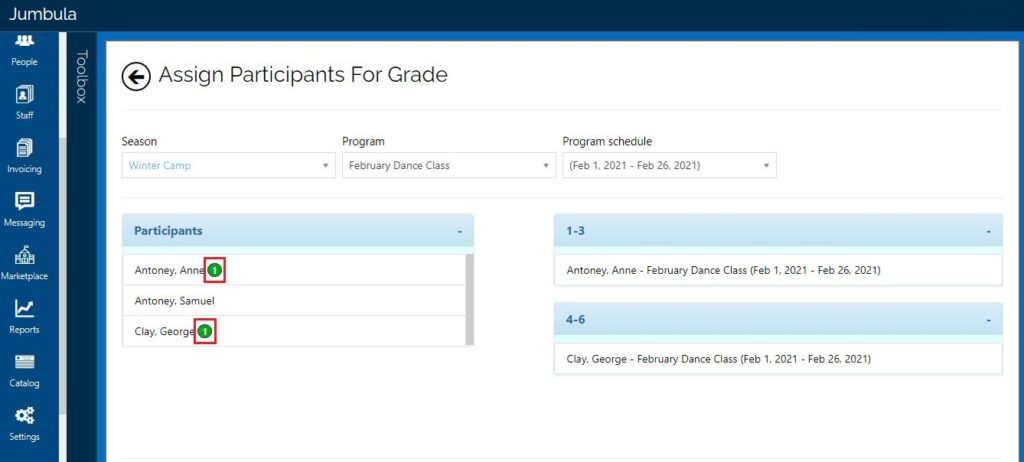
Note: You can not add a participant more than once to the same sub group but you can add the same participant to multiple sub groups.
Step 7: You can then assign an instructor to any of your created groups. Click on the action button select "Assign instructors".
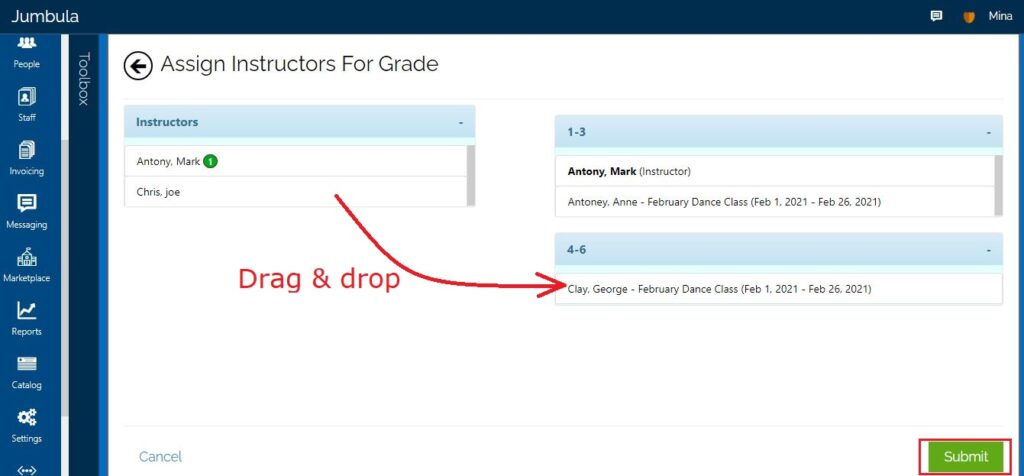
Step 8: You can assign an instructor to each sub group by drag and drop action and click submit to save.
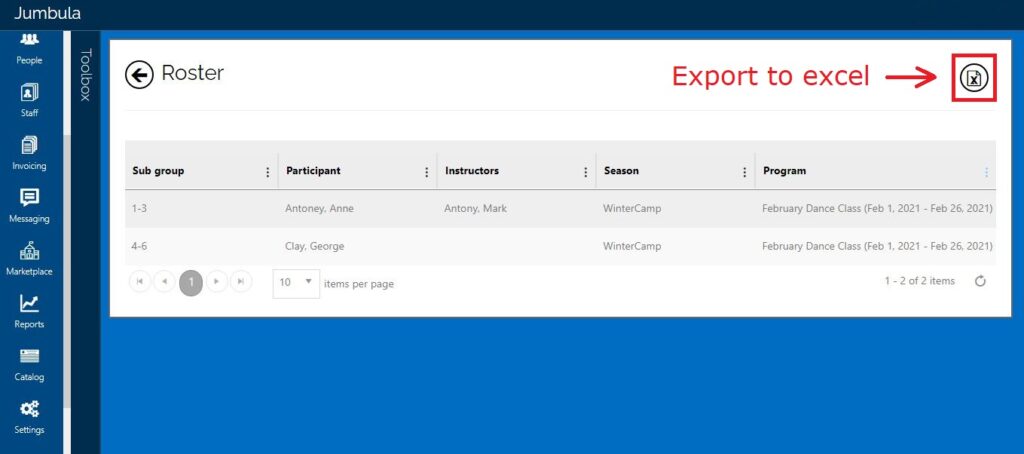
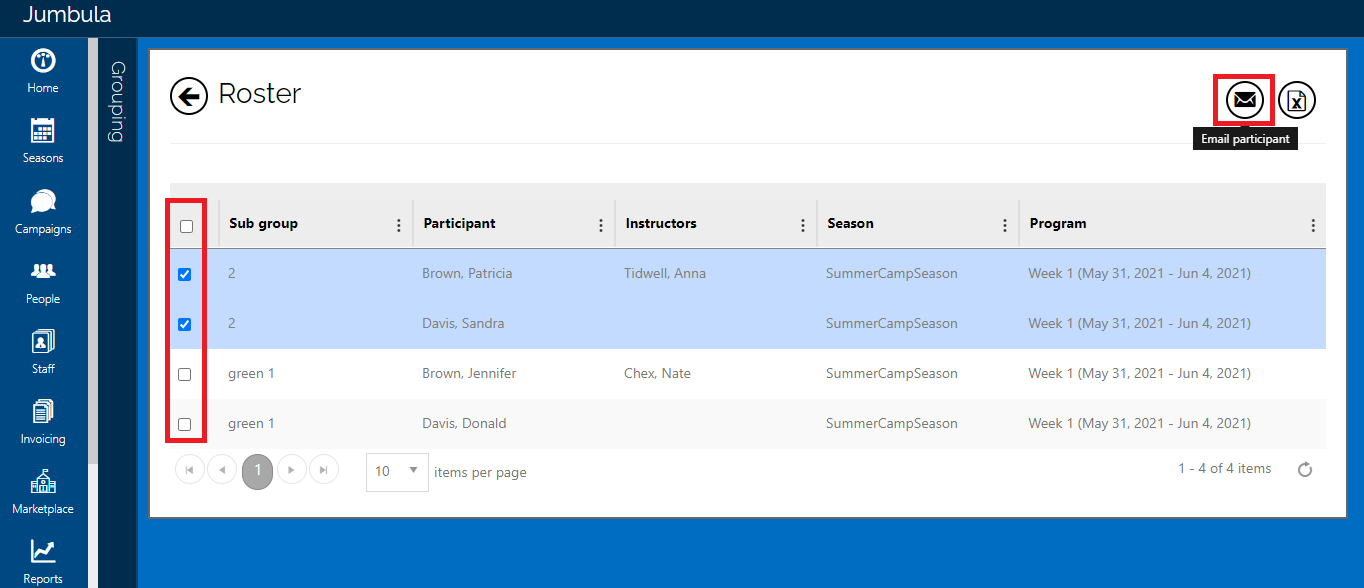
Step 9: You can run a roster report by hovering over the action button and choosing "Roster". You can view the roster in your dashboard or export it to excel. Also you can send email to participants by selecting the desired ones and clicking on "Email participant" icon.
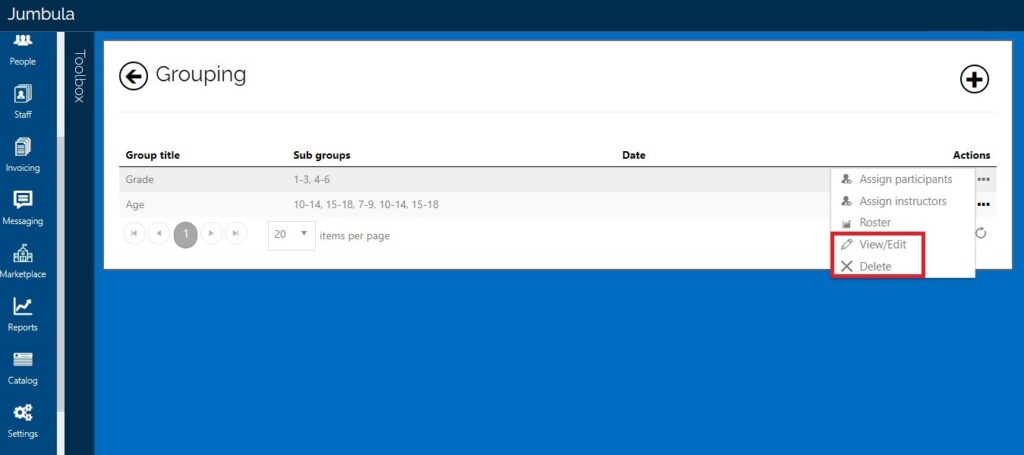
The two last actions are "View/Edit" and "Delete". "View/Edit" allows you to change a group title, add sub groups and edit the name of sub groups.
Contact us
Please don't hesitate to reach out if you have any questions. Contact our support team at support@jumbula.com.
Best Regards, Jumbula Support Team
Related Articles
Transferring a participant to another program
Overview Once you have taken online registrations you might need to transfer participants from one class/camp to another. You will be able to do this from your admin dashboard with a few steps. See below to learn more. There are two ways that you can ...Season overview
Overview When you start your set-up process the first thing you will do is create a new season. Seasons are used to organize your programs (classes, camps, events, etc.) into different groups. You will have a variety of different ways to organize ...How can I create a note on a user's profile or upload an image?
You can create a note or upload images for a user for internal use or external communication. Follow the instructions below Go to the Admin Dashboard > People > Participants Find the desired participant from the List Hover over the ... button Select ...Offline registration
In addition to having an online registration option, you might also need to register someone directly from your admin dashboard or what we consider an offline registration. Follow the instructions below Go to Season > Programs and orders Find the ...How can users complete the registration form and waivers after offline registration?
As a user, you can complete or edit the waivers and the registration form of a registration. Follow the instructions below To complete the waiver: Go to the Family Dashboard > Enrollments Click Order history Choose your specific order > choose your ...