Live activity reminders overview
Overview
We are pleased to announce the general availability of the Live Activity Reminder feature. Traditionally, with the Campaign system, you can communicate with your users by sending them one message for each campaign setup. If you want to send them another communication, you need to schedule another campaign. Live activity reminders provide the capability to send a sequence of messages to your users with only one setup.
Live activity reminders can be session based or program based. Session-based reminders send a message for each session of a class. A typical use case can be to send an email to your users prior to each session of your program to remind them of the upcoming class, the agenda, and so on. Program-based reminders send only one email to a participant for the entire program, not each session of the program. This method is useful, for example, to send a welcome message when someone enrolls for a class. You can set up both kinds of these reminders for a program, they are not mutually exclusive.
Follow the instructions below
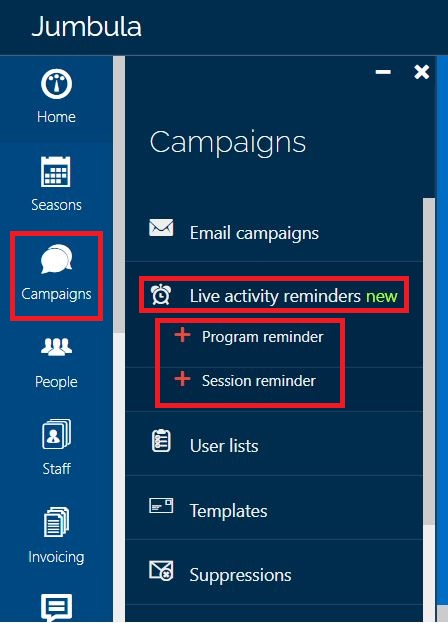
- Go to Jumbula Dashboard > Campaign > Live activity reminders
- Select the type of the reminder, Program reminder, or Session reminder
In the program or session reminder page:
- Enter a name in the Reminder name field
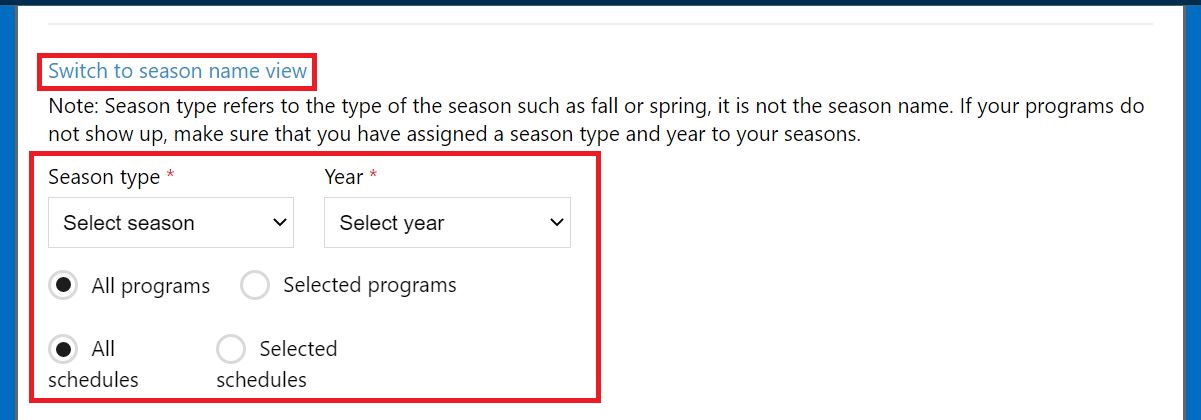
This is for your reference and this name will be displayed in the Live Activity Reminders list. - Select your desired Season type and Year from the dropdown boxes. Note that season type refers to the type of the season such as fall or spring, it is not the season name. If you want to use the season name option, click on Switch to season name view.
- You can include all the programs in a season by selecting the All programs option or you can select specific programs by selecting the Selected programs option.
 Note: For camp or before/after care programs, you will have two additional options, All schedules, and the Selected schedules.
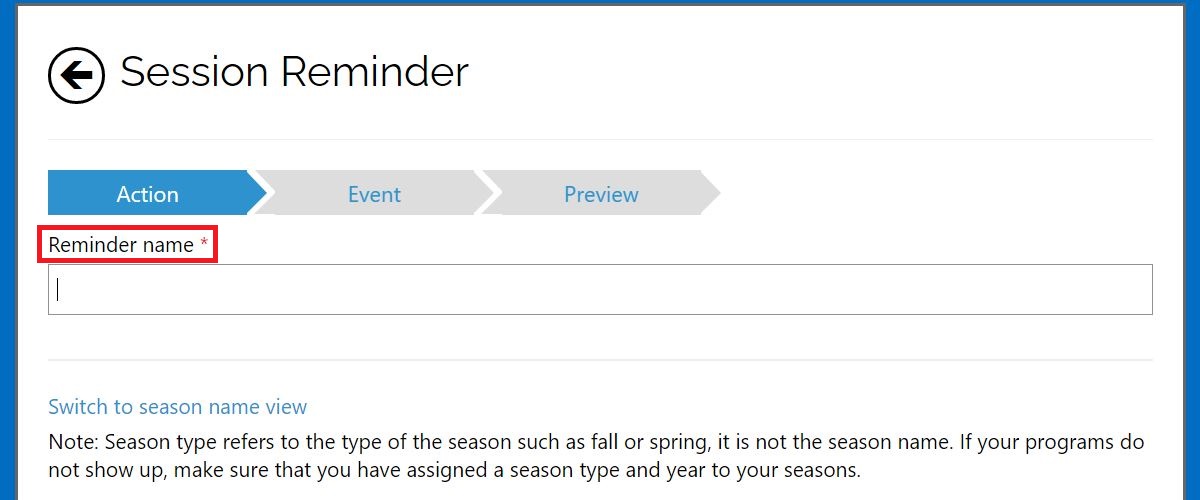
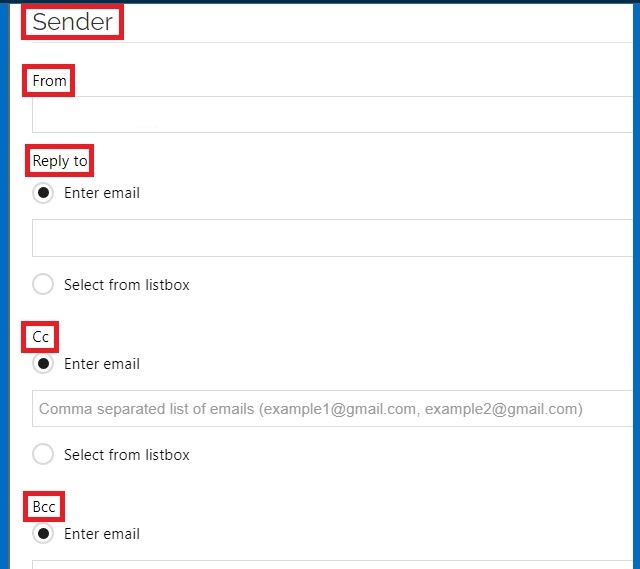
In the Sender section:
- Click on the From dropdown menu, the options in this dropdown menu are the emails associated with your account.
- Select the one that you want to be shown to your recipients as the from field.
- Use the Reply to field to choose the email that the replied-to emails should be sent to.
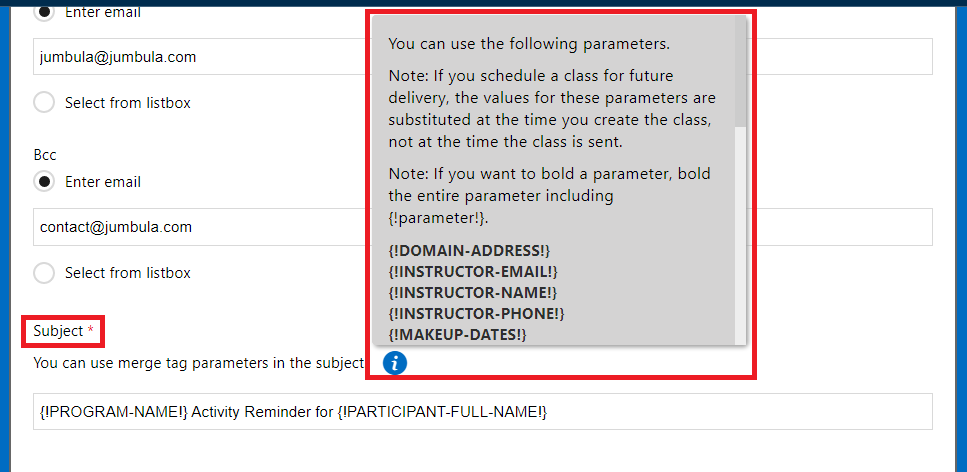
- Use the Cc (carbon copy) and Bcc (blind carbon copy) to further configure the emails.
- Enter the subject for your email in the Subject box. Note that you can use the merge tags in the live activity reminders. Click on the information icon i to see the list of options.
In the Email body section:
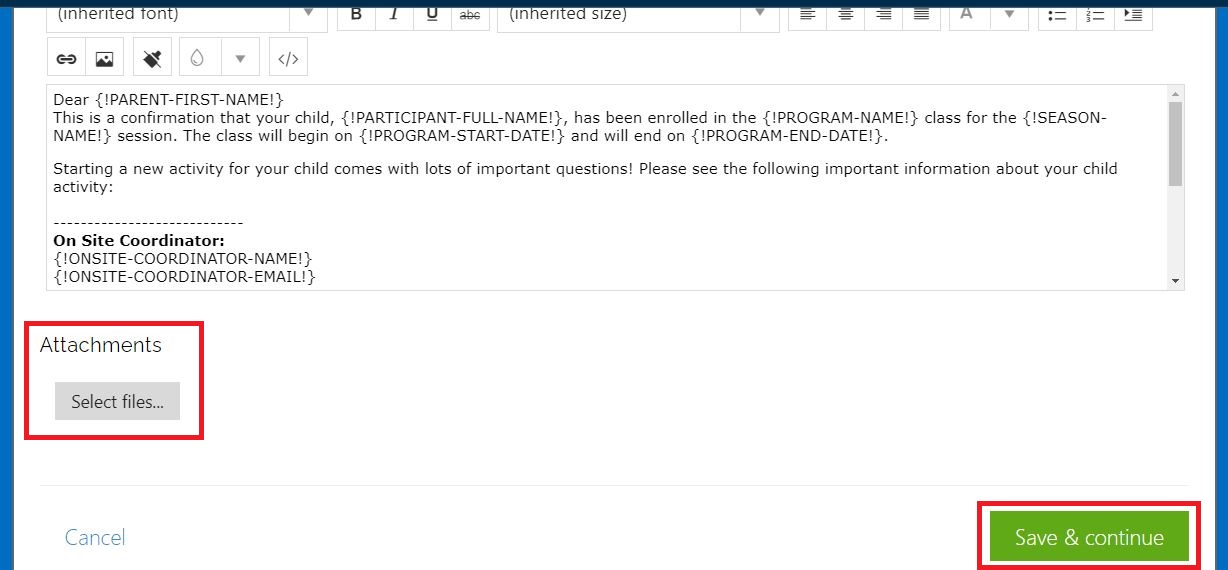
- Enter the content in the Email body, use the merge tags as needed.
- Use one of the email templates that you have saved before if you want by checking the Use template from the library checkbox.

- Click on the Select files... button if you want to attach any files to your email.
- Click on the Save & continue.
In the Event step:
- Select whether the reminder should be sent before or after the session/program starts.
- If you select the After option, only the Day drop-down box will be displayed for you.
- If you select the Before option, the Advanced options section will be displayed in addition to the Time field.
In the Advanced options part, if you select the first option, the new reminders will go out as soon as the first scheduled email triggers. With this option, you can schedule the first email, and then instruct the system to send a reminder to a participant as soon as the participant enrolls in the program. If you do not choose this option, the reminders will go out at scheduled times.
If you do not want to send the reminder to the already registered participants, select the second option.
Note: For the program based reminder there is an additional option which is Exact time, this option lets you send the reminder at the specific time, regardless of your program start and end date.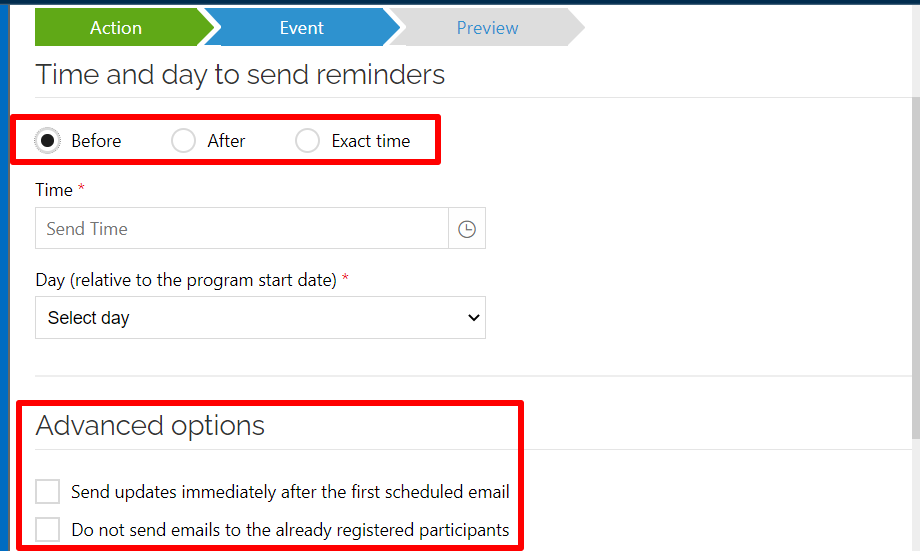
- Click on the Save & continue button.
Preview your settings and the email content in the preview step; send a test email if need be, and then click on the Submit button if everything looks good.
After submitting, you will be directed to the Live Activity Reminders page. This page lists all the reminders that you have scheduled and gives you the ability to stop, edit, or delete a reminder. Hover over the ... in the Actions column to see the various actions you can perform on a reminder.
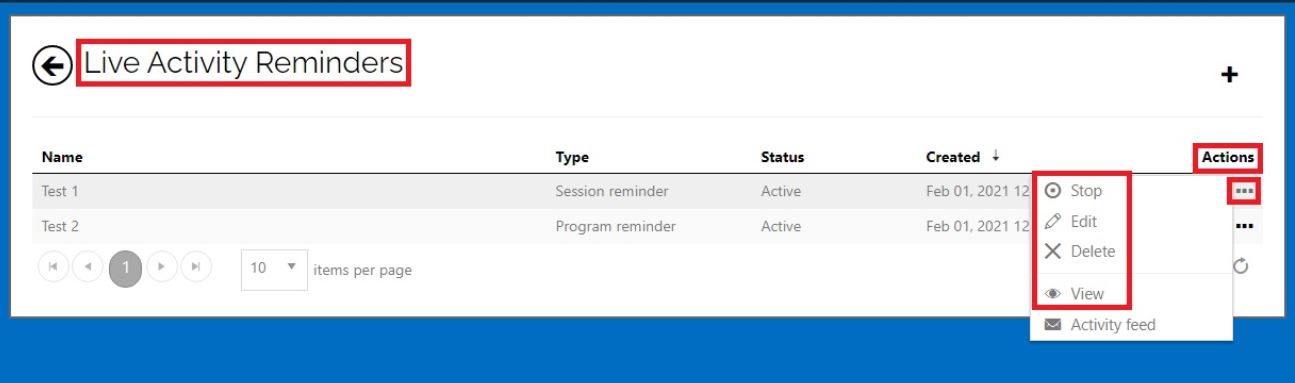
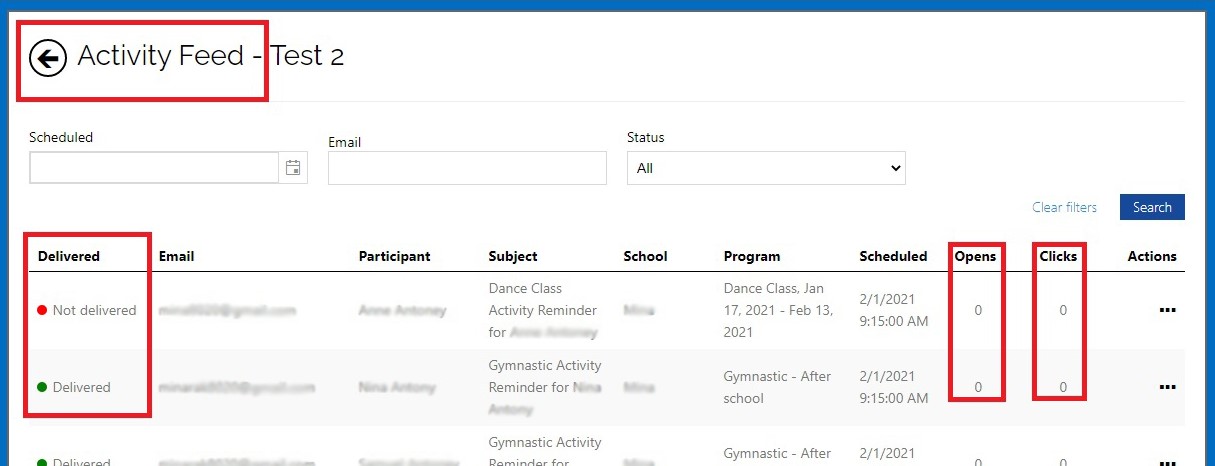
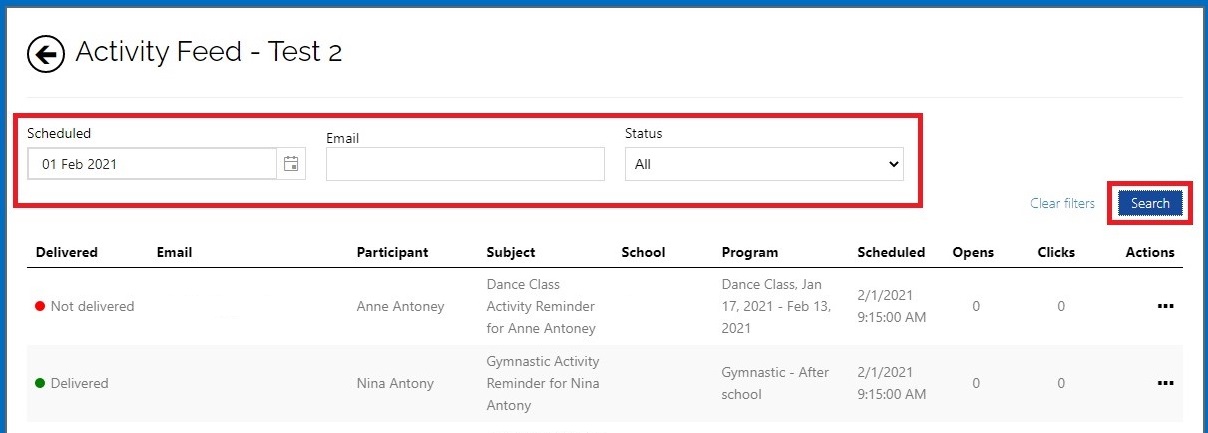
Use the Activity feed action to check the status of the reminders such as open, click, and delivery status.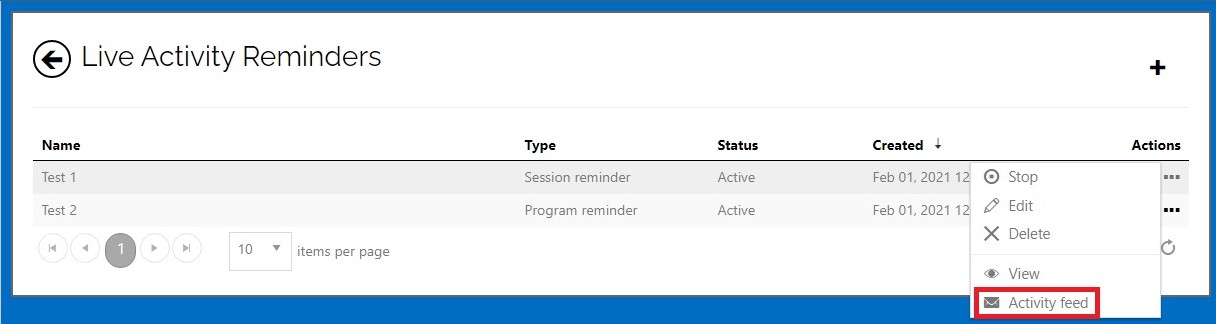
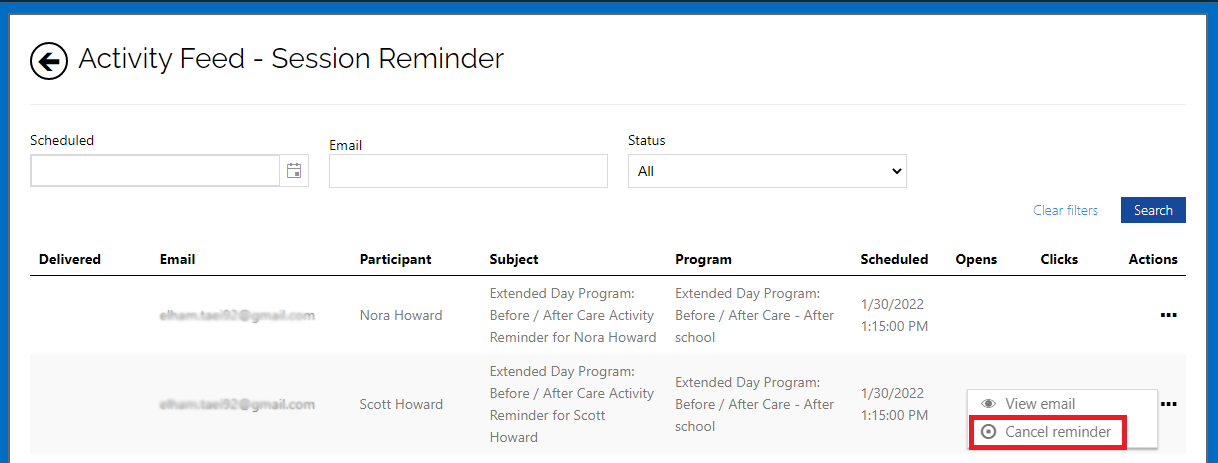
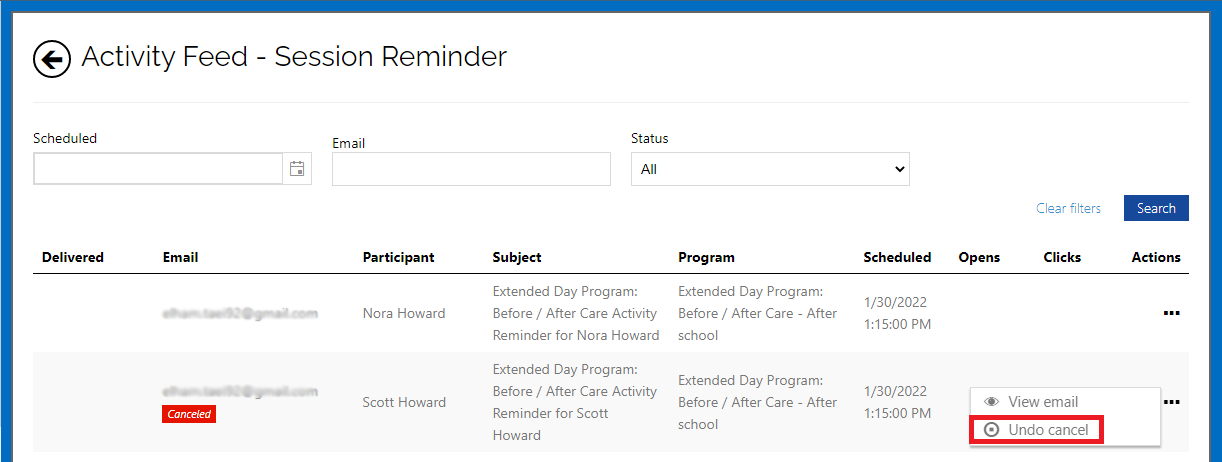
From the Activity Feed page you are able to cancel the scheduled reminders for a specific participant by hovering over ... in the Action column and selecting the Cancel reminder. Note that after the cancellation the Cancel reminder will change to Undo cancel.
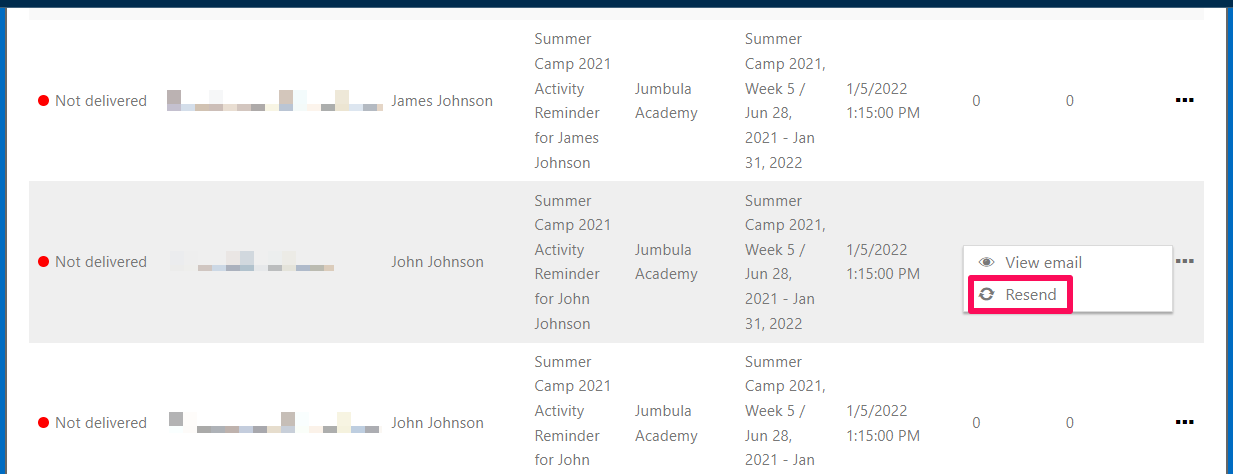
Also you can resend the reminder to a specific participant by hovering over ... in the Actions column and selecting the Resend.
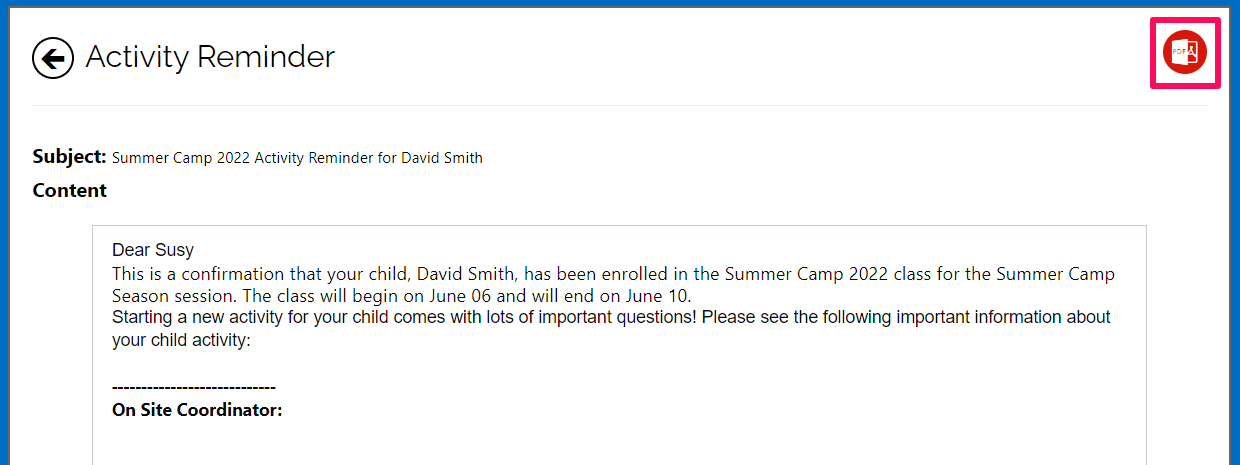
Additionally, if you want to export the email as a PDF file for a specific participant, hover over ... in the Actions column and select the View email, then click PDF icon at the top right-hand.
Use the Search button to filter the activity feed based on your needs.
Related articles:
Please don't hesitate to reach out if you have any questions. Contact our support team at support@jumbula.com.
Related Articles
Email campaigns overview
Overview You can use Email campaigns to send emails to a large number of users based on various criteria and conditions. You have the option of sending the campaigns immediately or schedule them for future delivery. There are three ways to send email ...Tutorial Video - Jumbula homesite overview
Overview Once you have created your programs you might want to use the Jumbula homesite tool to post your programs for online registrations. You will be able to create a professional looking landing page where visitors can browse the variety of ...Email campaign templates
Email templates can be used during setting up your email campaigns or live activity reminders, but first, need to be created. Follow the instructions below Go to Jumbula Dashboard > Campaigns > Templates > Add new template Enter a name in the ...How to set up WebConnect?
Overview Jumbula WebConnect allows you to embed your programs directly on your own website. This integration allows families to: Browse your live program listings Filter by categories, dates, or preferences Register instantly without leaving your ...FAQ · Is the Jumbula Homesite mobile-friendly?
Yes, your Jumbula Homesite is responsive and works smoothly on phones, tablets, and desktops. ? Related Articles ➡️ How to use Jumbula Homesite? Need Additional Help? Contact us at support@jumbula.com, or use the live chat widget on your Admin ...